Email Ticket Configure
To automate your email ticketing system, set up a cron job on your server to run a script at regular intervals. Use the crontab command to schedule the job. For instance, to execute a script every hour, add "0 * * " to crontab. In the script, integrate a command-line email client or an API to fetch and process new tickets. Ensure the script handles error scenarios gracefully and sends confirmation emails. Periodic cron execution guarantees timely ticket updates, enhancing customer support efficiency. Regularly monitor the cron logs for insights and adjustments. This automated approach ensures a streamlined and responsive email ticketing system.
1. How to Set up Cron On Your Vps server
To create a daily cron job on a VPS running Ubuntu for the purpose of generating ticket using the php artisan sync-email command, follow these steps and create documentation:
Objective
This documentation outlines the steps to set up a daily cron job on your server to run the php artisan sync-email command. This command is responsible for creating ticket using email.
Prerequisites
- A server running a Linux-based operating system (e.g., Ubuntu, CentOS, or Debian).
- A Laravel project with the artisan command accessible.
- Basic knowledge of the Linux command line and cron jobs.
Step 1: SSH into Your VPS
- Open your terminal or preferred SSH client.
- SSH into your VPS using your server's IP address and your SSH key or password.
Step 2: Edit the User's Cron Table
- To edit the user's cron table, use the crontab command. Replace
usernamewith your actual username. - This opens the user's crontab file for editing.
Step 3: Add the Daily Cron Job
- Add a new entry to schedule the
php artisan sync-emailcommand to run daily. Insert the following line:
0 0 * * * /usr/bin/php /path/to/your/laravel/project/artisan sync-email >> /path/to/your/log/file.log 2>&1
0 0 * * * : This sets the cron job to run at midnight every day./usr/bin/php: Specifies the full path to the PHP executable./path/to/your/laravel/project/artisan: Replace this with the actual path to your Laravel project's artisan script.-
>> /path/to/your/log/file.log 2>&1: This appends the output of the command to a log file. Replace /path/to/your/log/file.log with the actual path where you want to store the log file. -
Save the file and exit your text editor. In most text editors, you can save and exit by pressing Ctrl + X, then Y, and finally Enter.
Step 4: Verify the Cron Job
- To verify that the cron job has been added successfully, list the user's current cron jobs:
crontab -l
You should see the new entry you added.
Step 5: Restart the Cron Service (Optional)
In some cases, you might need to restart the cron service to apply the changes. Use the following command to restart the cron service:
sudo service cron restart
You have successfully set up a daily cron job on your Ubuntu VPS server to run the php artisan sync-email command. This will automate the process of generating ticket from email.
Please remember to monitor the log file to ensure that the command is executing as expected and that any errors or issues are properly logged.
2. How To Set Up Cron On Your Windows server
Objective
This documentation outlines the steps to set up a daily scheduled task on a Windows server for running the php artisan sync-email command. This command is responsible for creating ticket from email.
Prerequisites
- A Windows server.
- PHP installed and accessible from the command line.
- A Laravel project with the artisan command accessible.
Step 1: Open Task Scheduler
- Press
Win + Rto open the Run dialog. - Type
taskschd.mscand click OK. This will open the Task Scheduler.
Step 2: Create a Basic Task
- In the Task Scheduler, on the right-hand side, click on "Create Basic Task."
Step 3: Name and Description
- Enter a name and an optional description for the task.
- Click "Next" to continue.
Step 4: Trigger
- Choose "Daily" as the trigger type.
- Click "Next."
Step 5: Daily Trigger Settings
- Set the "Recur every" field to "1" day.
- Set the start date and time for the task.
- Click "Next."
Step 6: Action
- Select "Start a program" as the action.
- Click "Next."
Step 7: Program Script
- In the "Program/script" field, enter the full path to your PHP executable, e.g.,
C:\php\php.exe. - In the "Add arguments (optional)" field, enter the full path to your Laravel project's
artisanscript followed by thesync-emailcommand, e.g.,C:\path\to\your\laravel\project\artisan sync-email. - In the "Start in (optional)" field, enter the path to your Laravel project's directory, e.g.,
C:\path\to\your\laravel\project. - Click "Next."
Step 8: Summary
- Review the summary of your task.
- If everything looks correct, click "Finish."
Step 9: Configure for Your Environment
- In the Task Scheduler Library, find your newly created task.
- Right-click on the task and select "Properties."
General Tab
- Under the "General" tab, configure settings such as "Security Options," "Change User or Group," or "Run with the highest privileges" based on your specific server setup and security requirements.
Triggers Tab
- Under the "Triggers" tab, you can edit the daily trigger settings, such as the exact time when the task runs.
Actions Tab
- Under the "Actions" tab, you can edit the program/script, arguments, and start in settings.
Step 10: Save and Test
- After configuring the task properties, click "OK" to save the changes.
You have successfully set up a daily scheduled task on your Windows server to run the php artisan sync-email command. This will automate the process of generating ticket from email in your Laravel application on a shortly basis.
Please ensure that PHP and your Laravel project paths are correctly specified, and monitor the task to ensure it executes as expected.
3. How To Set Up Cron On Your Cpanel
Objective
This documentation outlines the steps to set up a daily cron job in cPanel to run the php artisan sync-email command. This command is responsible for creating ticket from email.
Prerequisites
- Access to a cPanel account.
- A Laravel project hosted on your server.
- Basic knowledge of cPanel and the Linux command line.
Step 1: Log In to cPanel
-
Open your web browser and navigate to your cPanel URL. This is typically
https://yourdomain.com:2083or a similar address. -
Log in with your cPanel username and password.
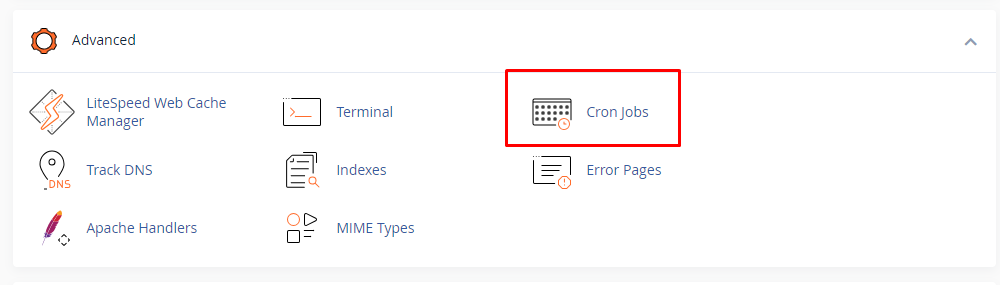
Step 2: Find the "Cron Jobs" Section
-
Inside your cPanel dashboard, scroll down to the "Advanced" section or search for "Cron Jobs."
-
Click on the "Cron Jobs" icon to access the cron job management interface.
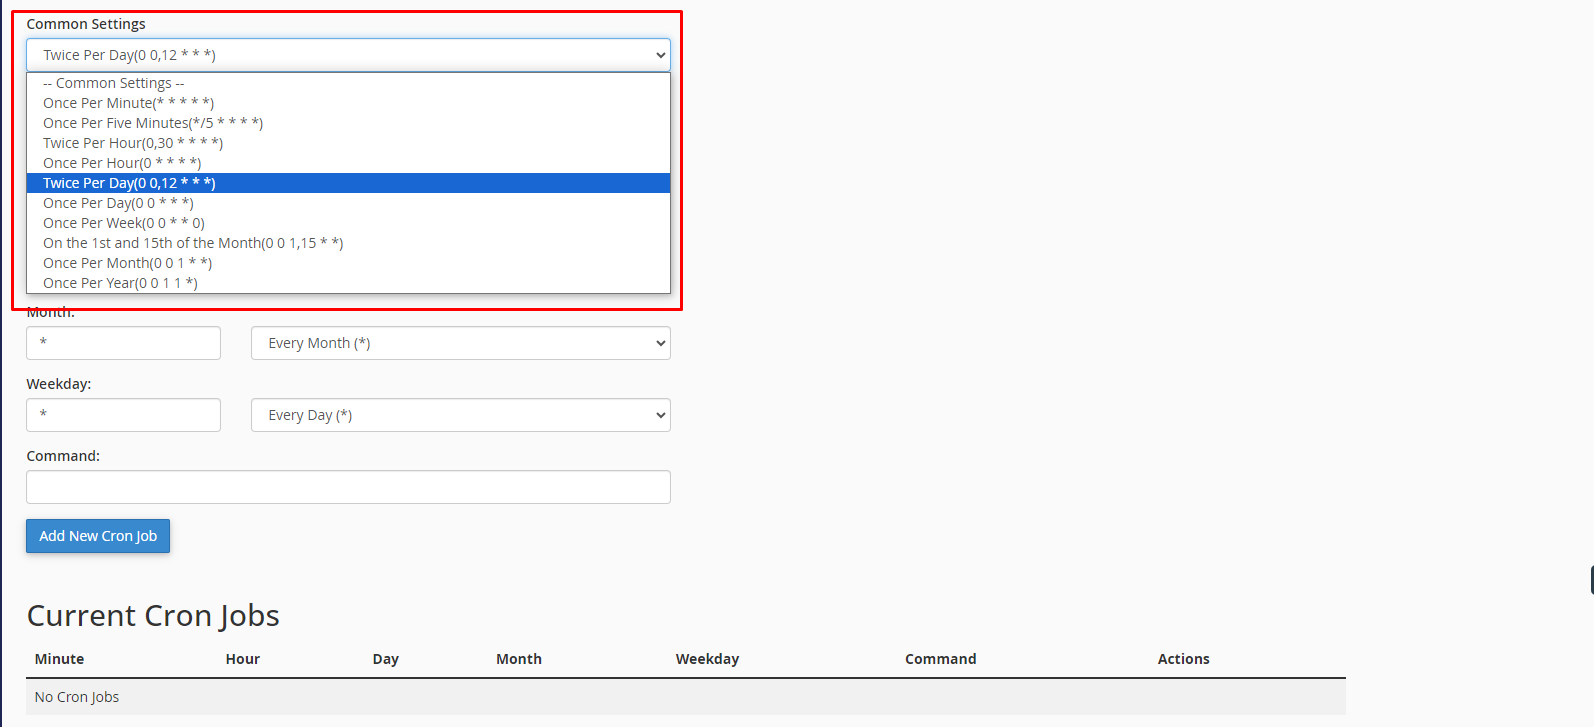
Step 3: Add a New Cron Job
-
In the "Cron Jobs" interface, under "Add New Cron Job," you'll see options for setting the schedule.
-
Common Settings: Choose "Once Per Day."
- In the "Command" field, enter the command to run the Laravel Artisan command:
/usr/bin/php /home/yourcpanelusername/public_html/path/to/your/laravel/project/artisan sync-email
/usr/bin/php:Specifies the full path to the PHP executable./home/yourcpanelusername/public_html/path/to/your/laravel/project/artisan:Replace this with the actual path to your Laravel project'sartisanscript.-
sync-email:This is the Laravel Artisan command you want to run. -
Click the "Add New Cron Job" button to save your settings.
Step 4: Verify the Cron Job
After adding the cron job, you'll see a confirmation message. The cron job will now run daily, executing the php artisan sync-email command.
Step 5: Monitor the Execution
To ensure the cron job is running as expected, monitor the Laravel application's logs or any output generated by the sync-email command.
You have successfully set up a daily cron job in cPanel to run the php artisan sync-email command. This will automate the process of generating ticket from email.
Please adjust the paths and details to match your specific cPanel setup and Laravel project configuration.