Configurable
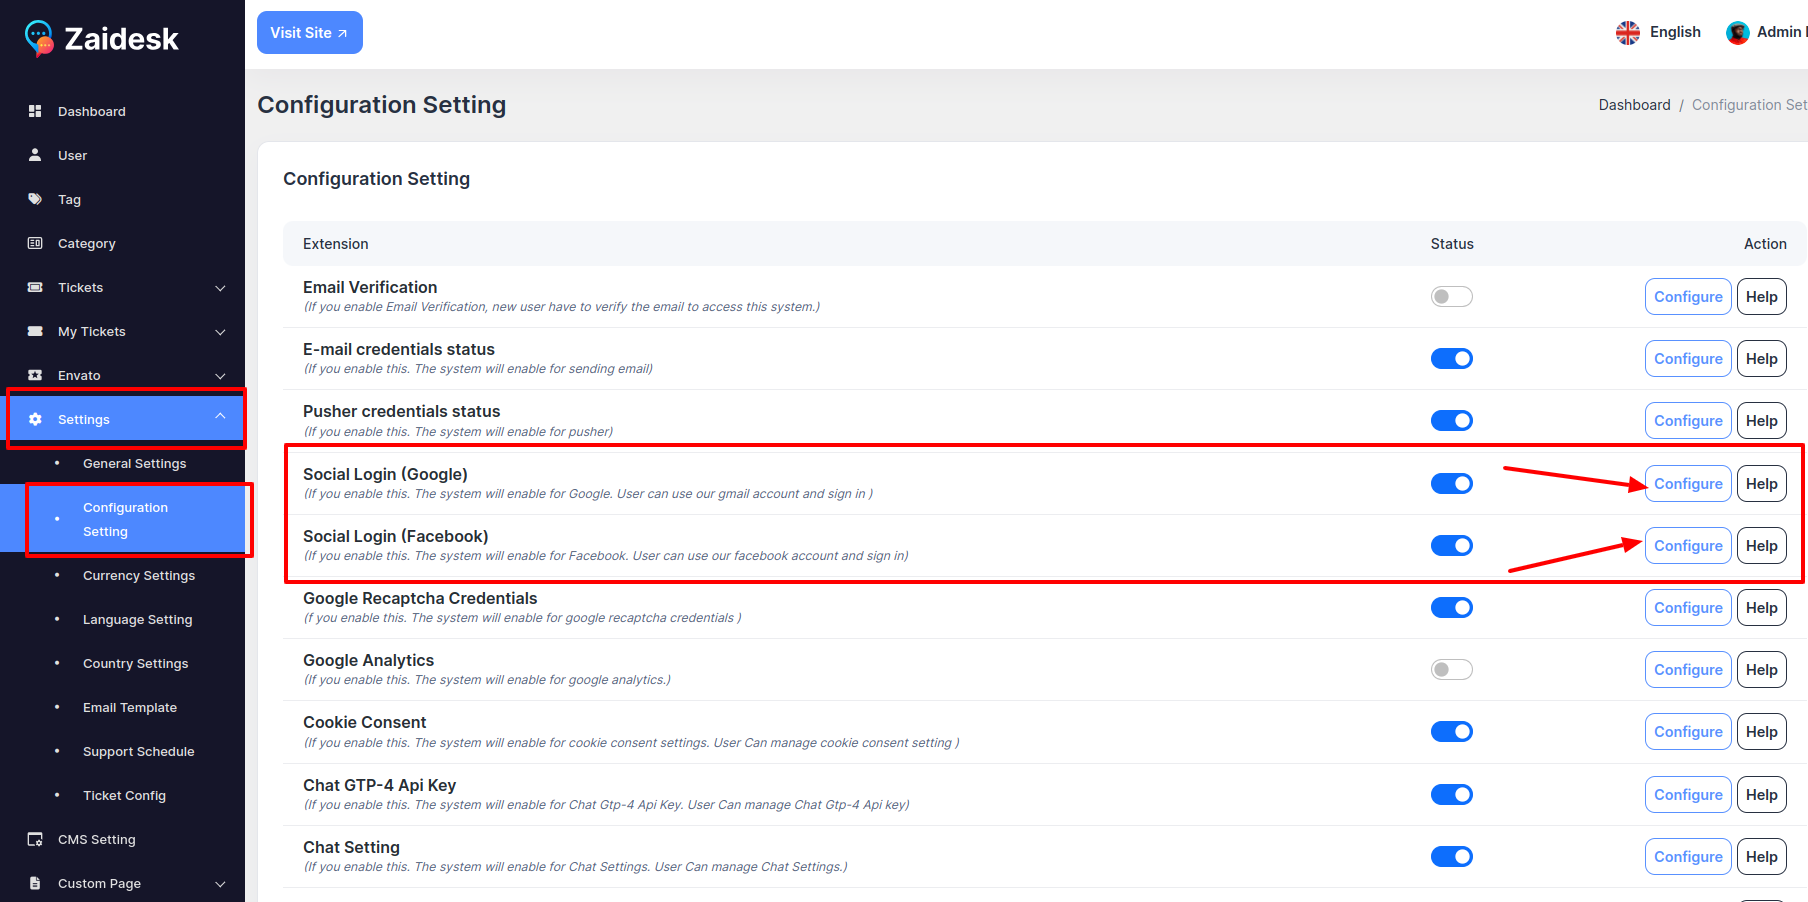
Social Login(Google)
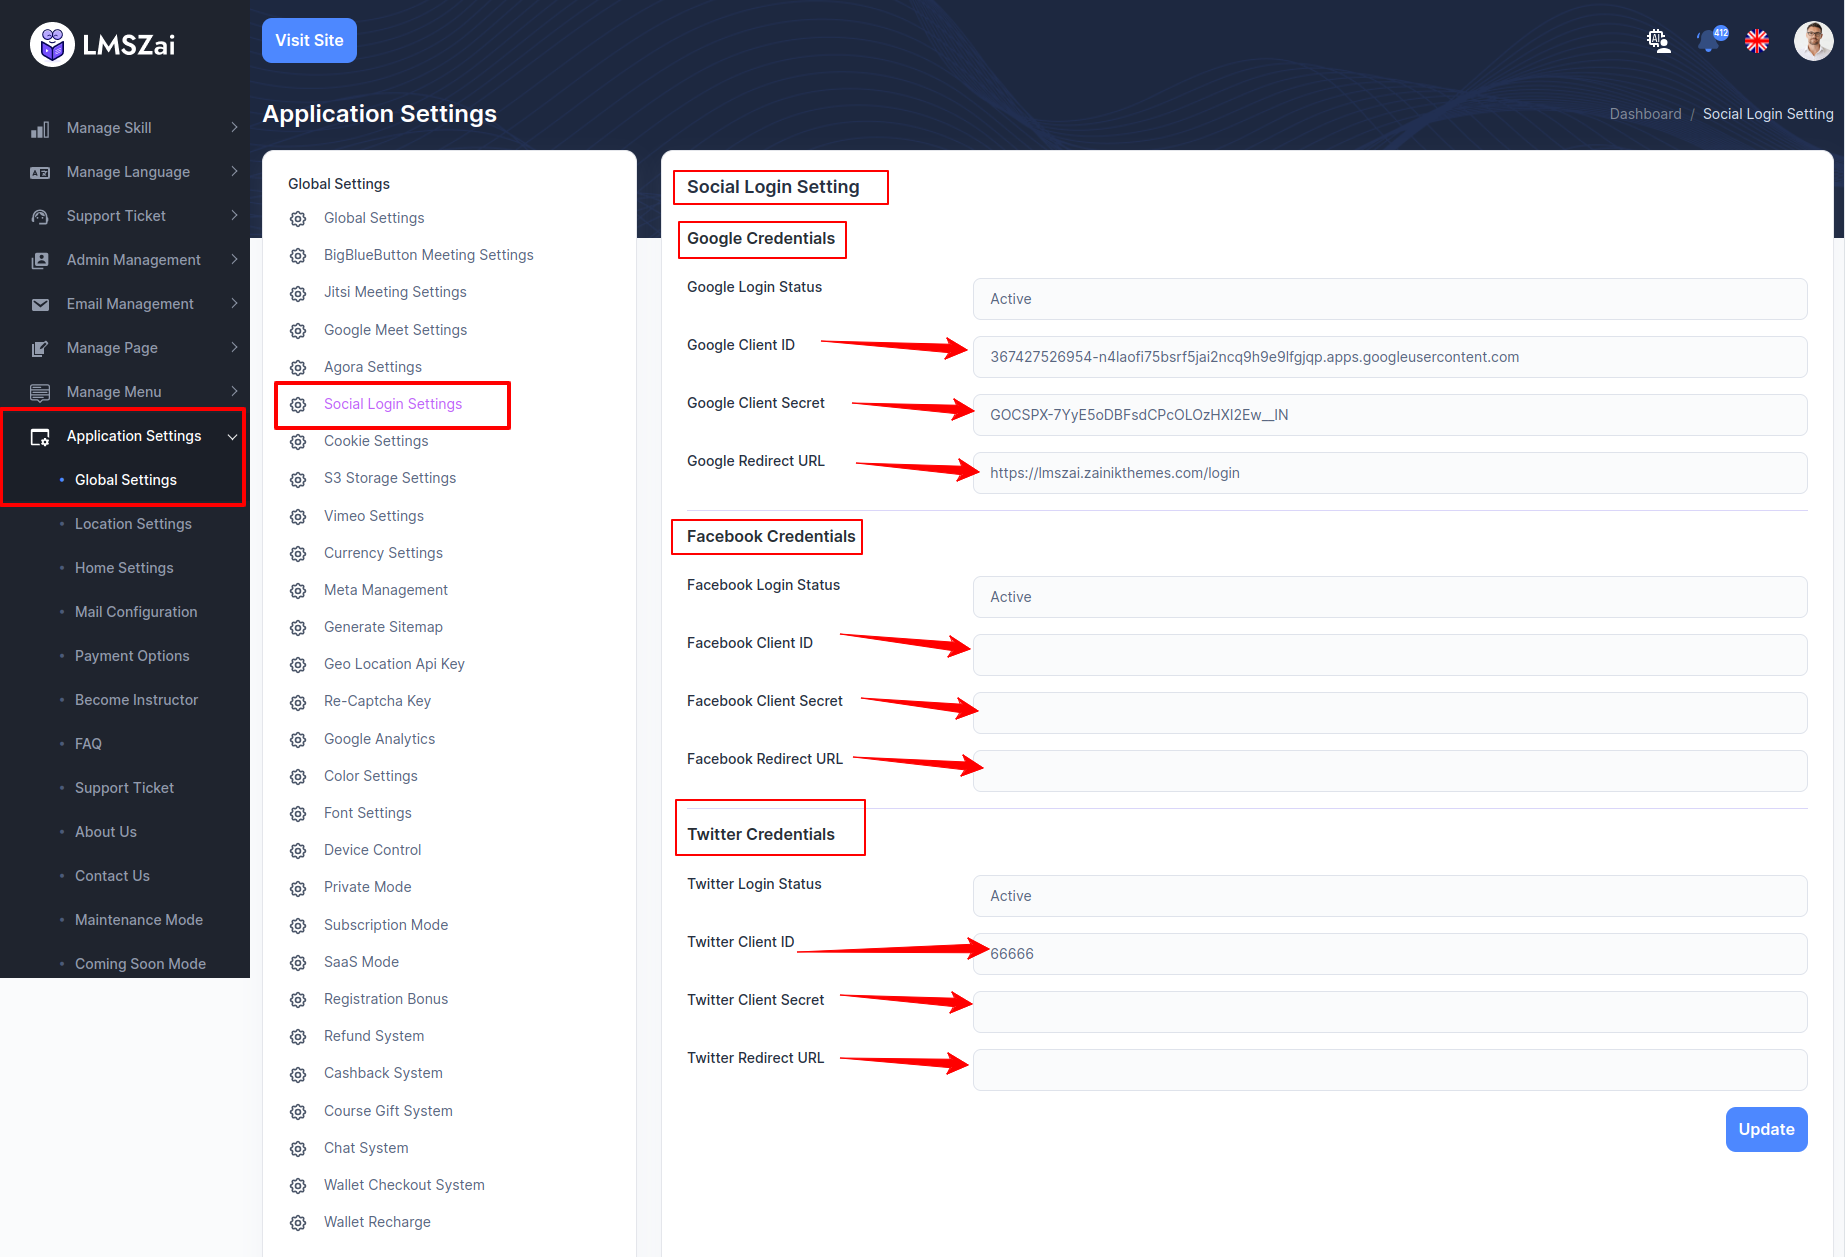
Google Credentials:
For social login features (Google), you have to add some credentials to the admin settings. Firstly, go to the social login settings in the global settings subcategory of Application settings.
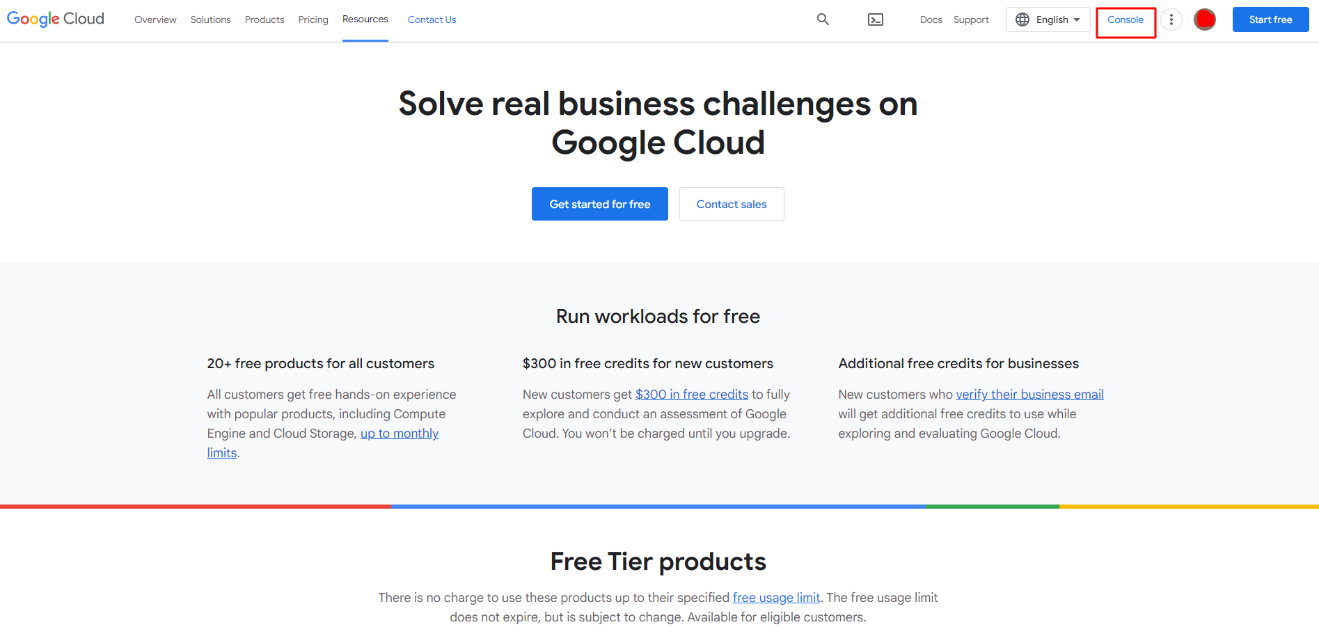
Now create Google credentials. For that, you need to sign in to your Google account. After that, you have to go to the URL (console.cloude.google.com) Click on the console.
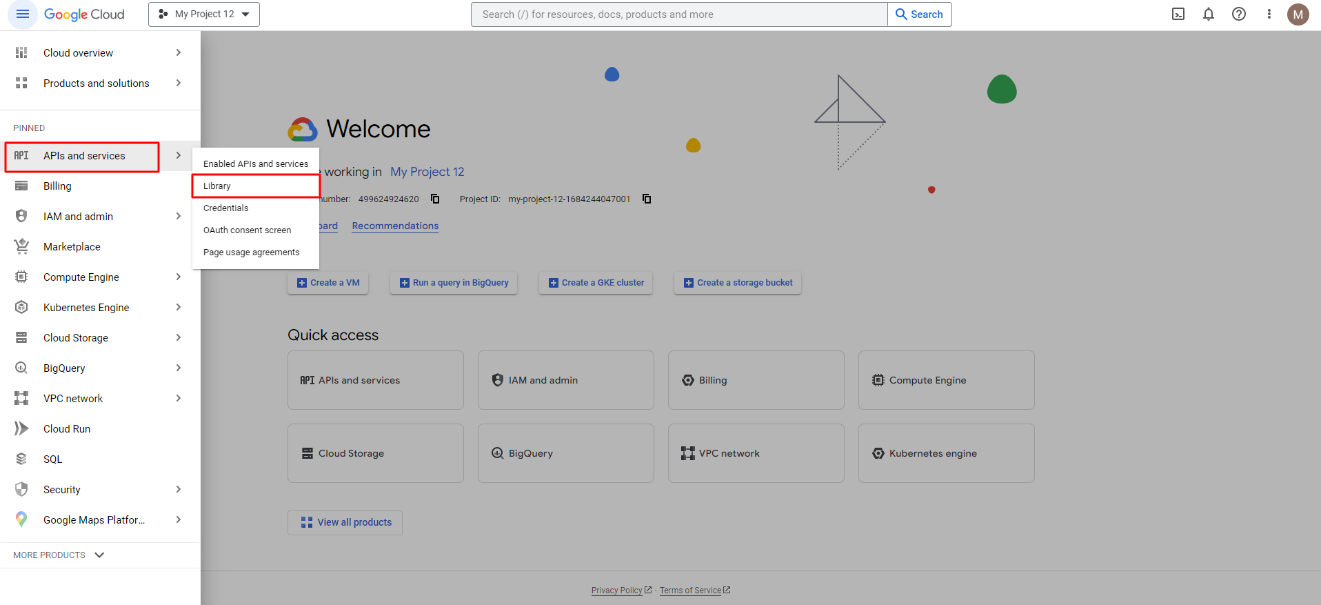
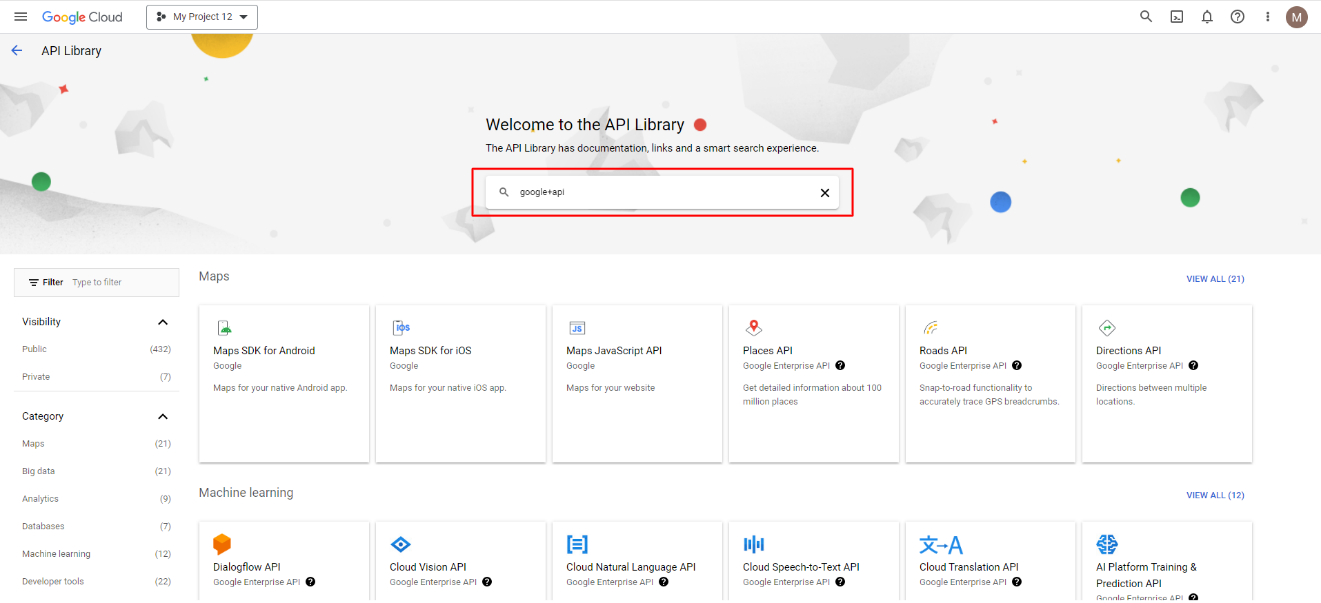
Then click the menu bar and go to APIs and Services, and you have to go to the Library section.
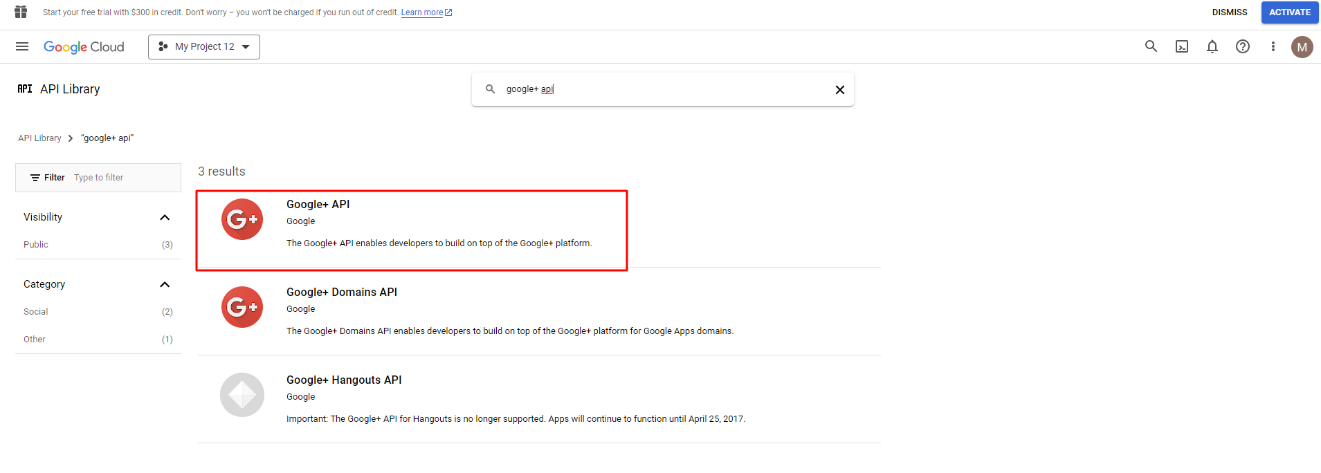
In the library, when you reach it, you have to go to the Google+ API.
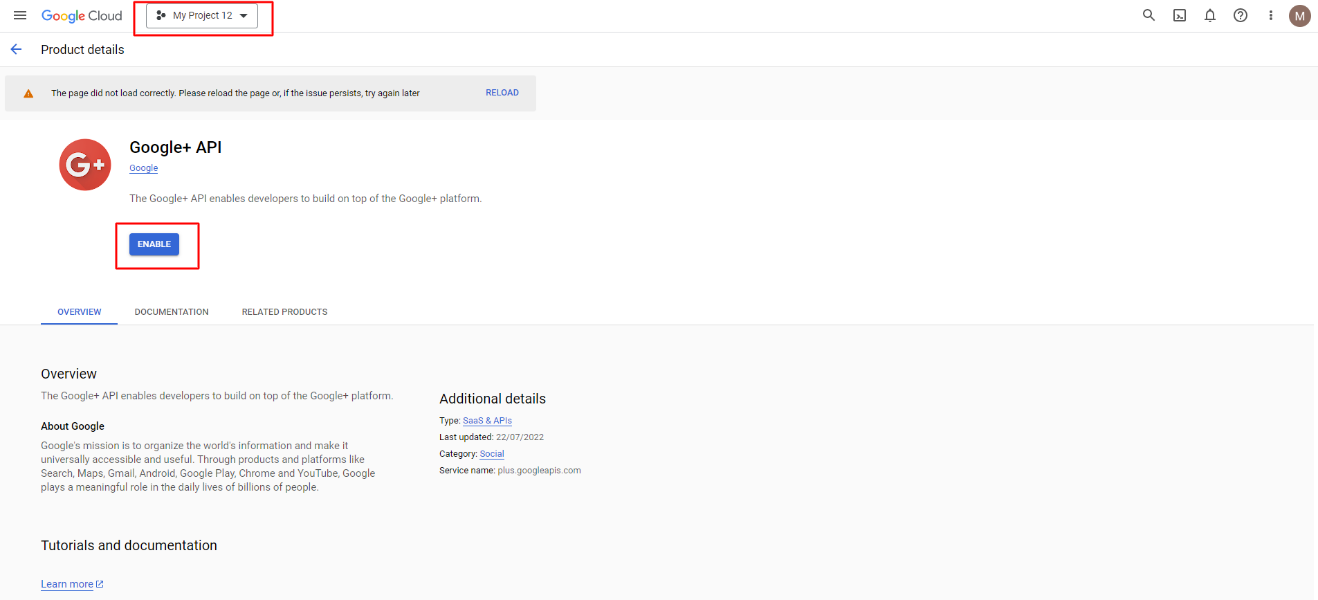
After that, you can see the Google+ API section below.
After that, click the enable button to enable this API. Now click my project button.
Now create a new project, or you can choose an existing one.
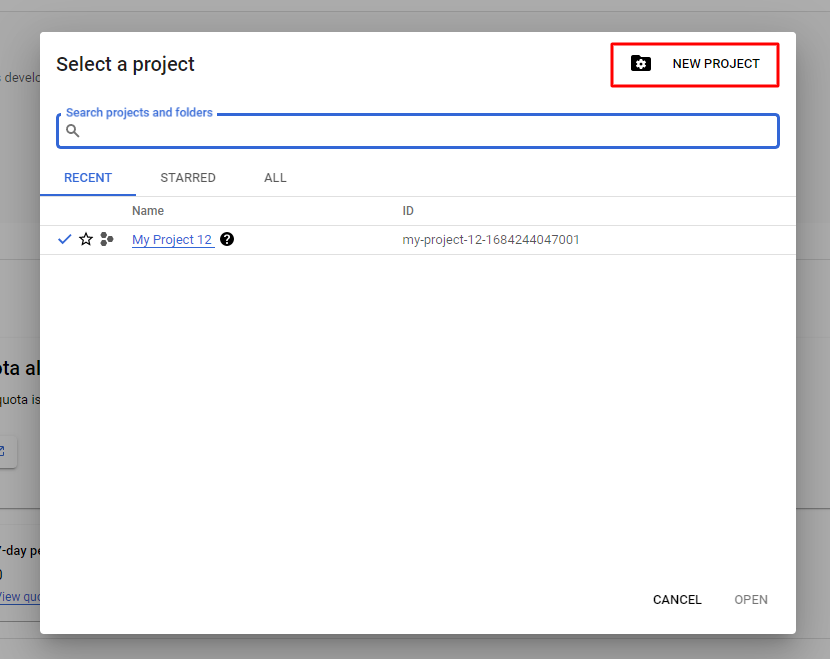
Give the project a name.
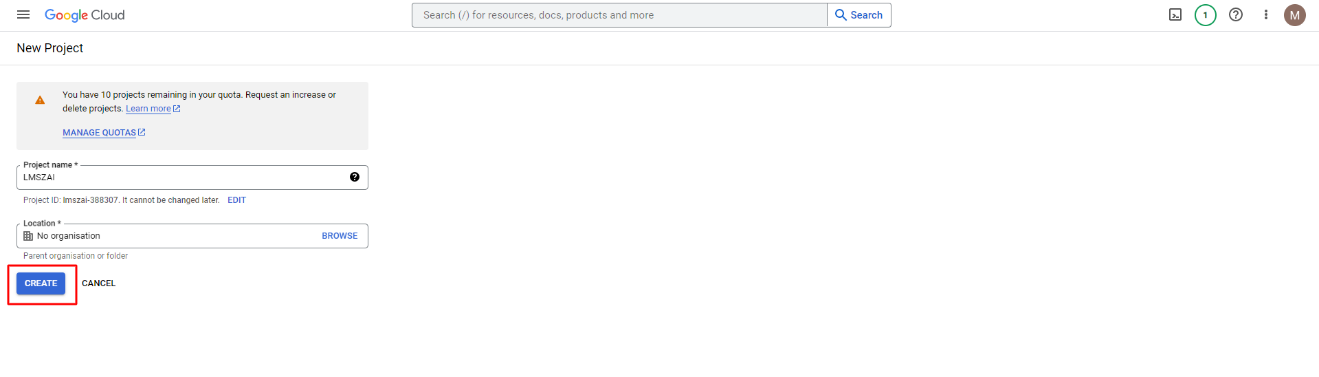
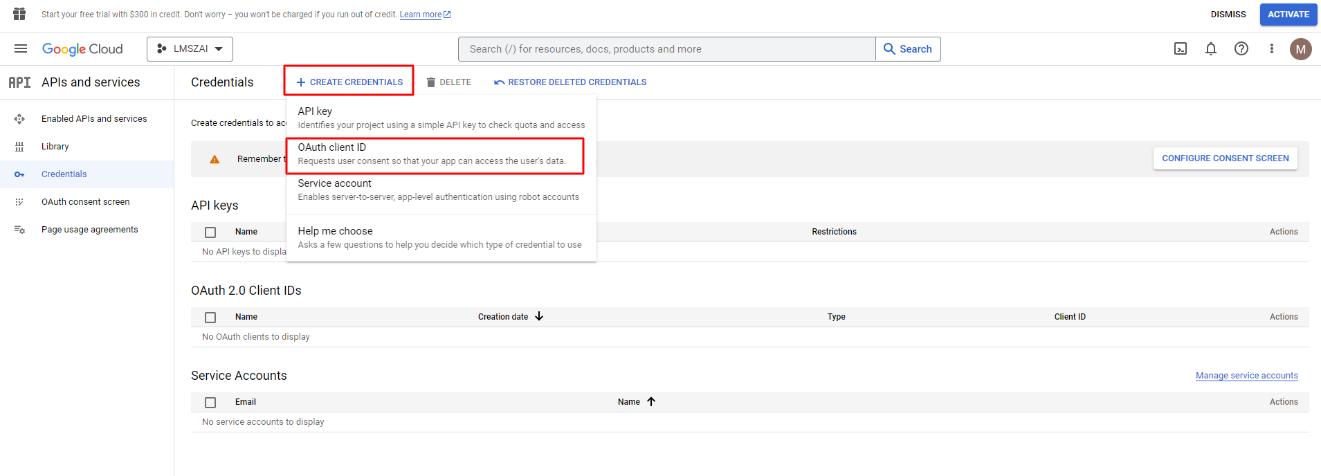
So, your project will be created here. Now go to the credential section to create credentials for your project. Click the create credential button.
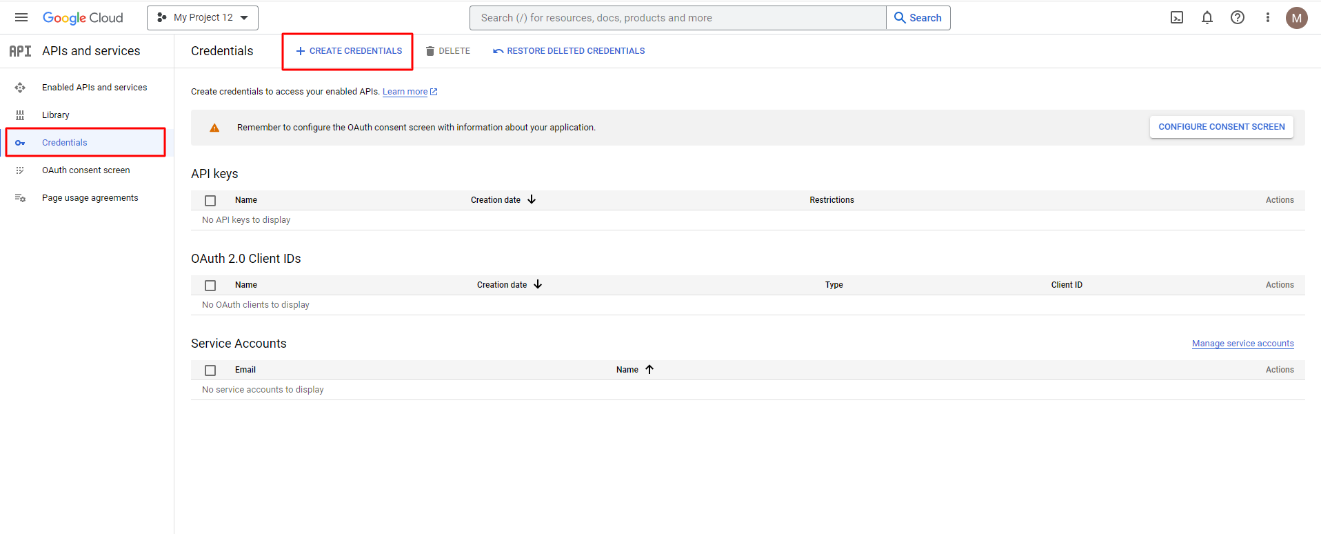
Click the OAuth client ID.
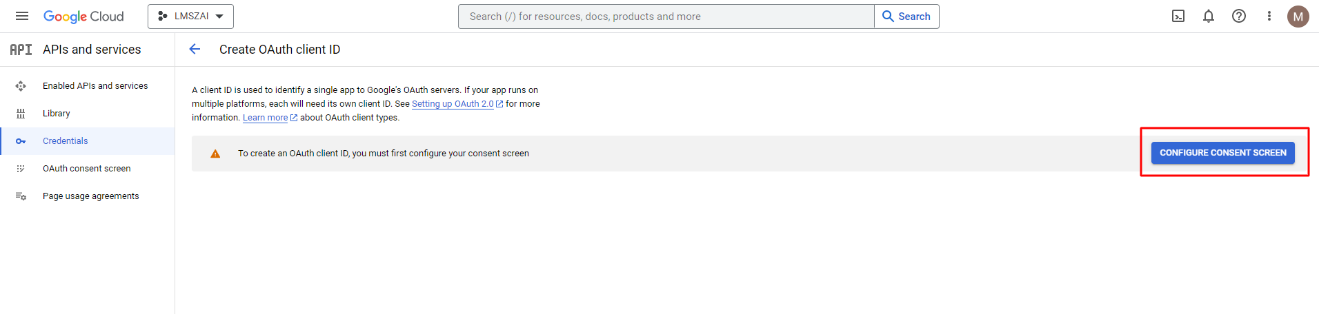
To create an OAuth client ID, you must first configure your consent screen. Click here.
Now you have to choose the user type external and create.
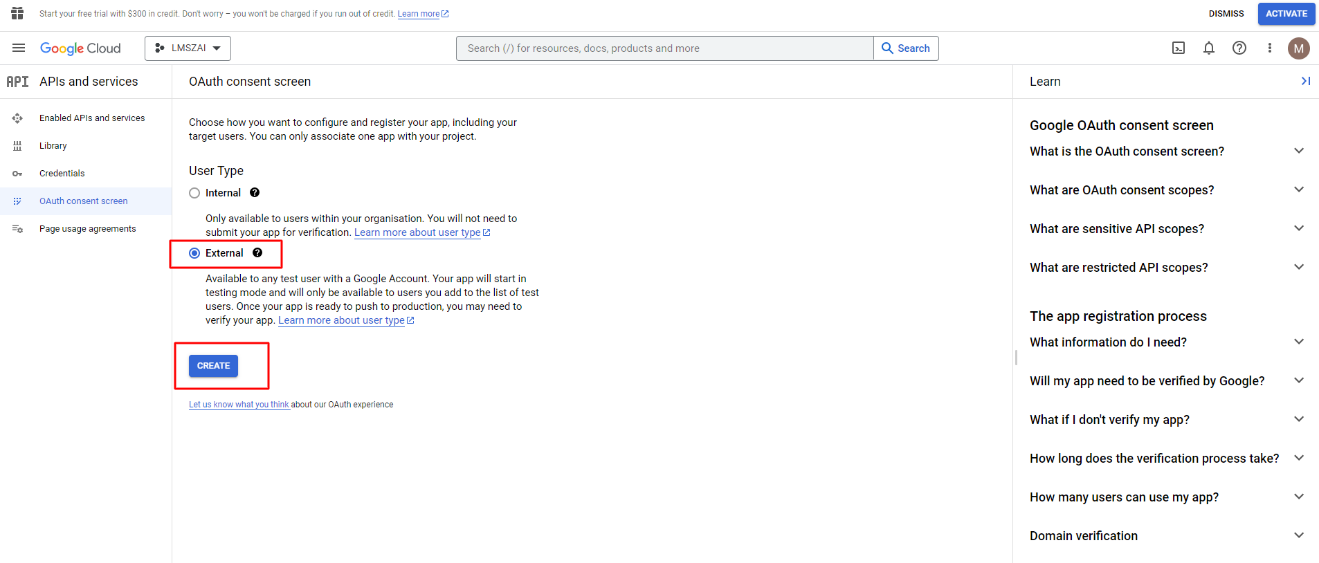
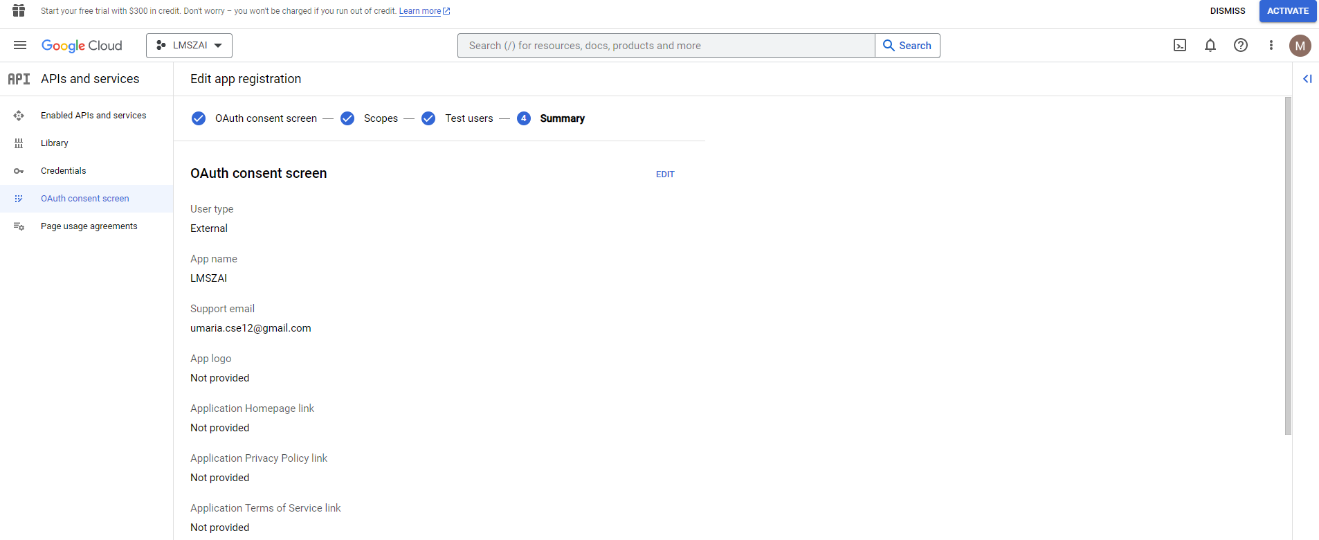
Give the app information
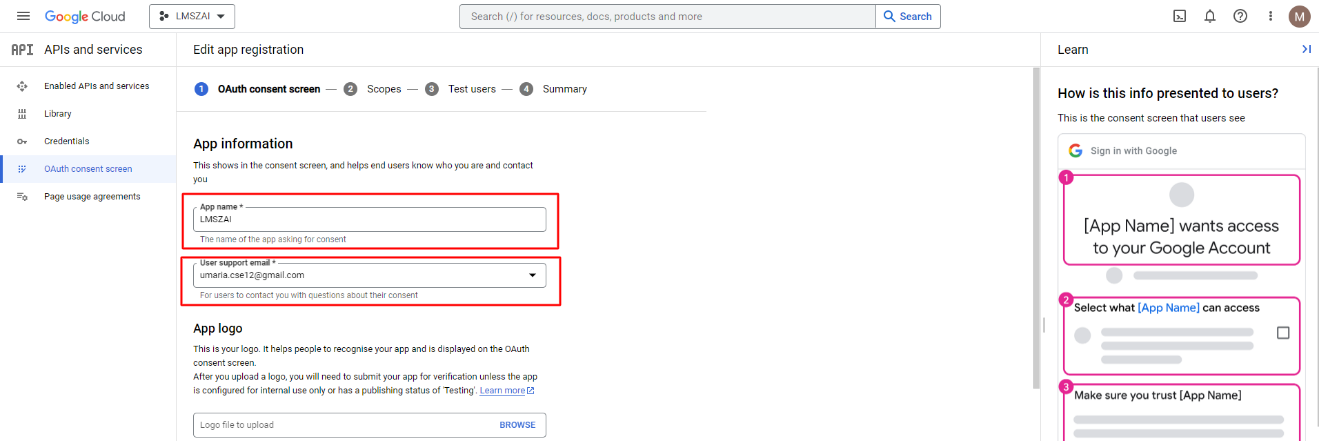
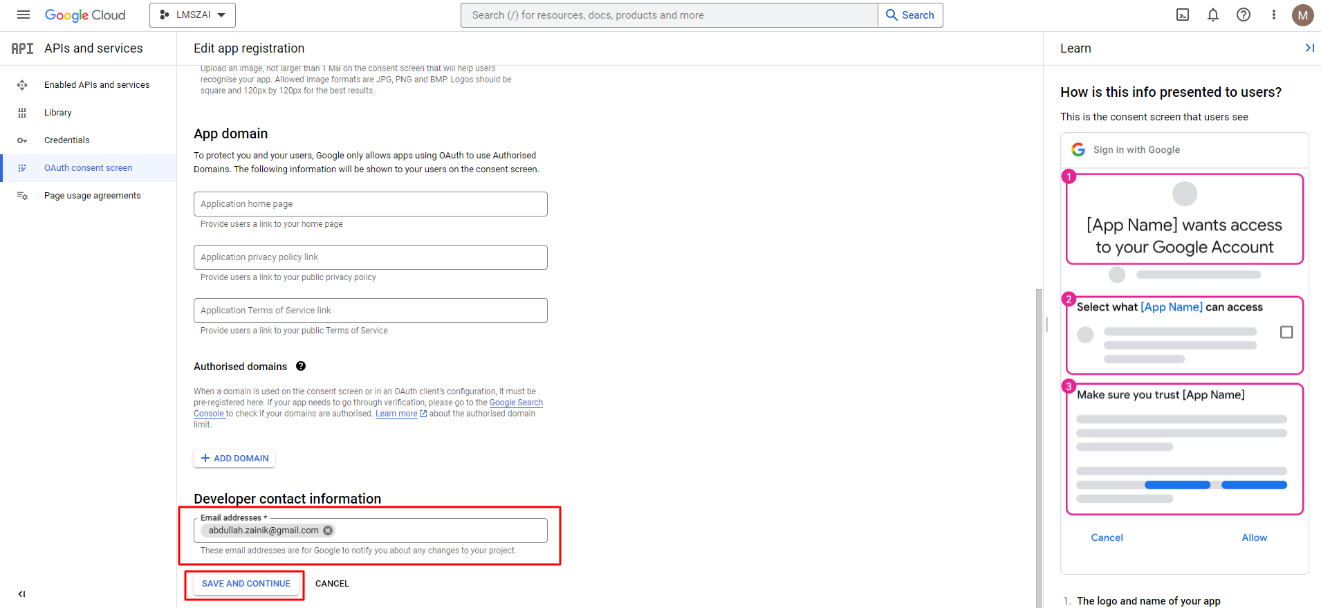
In the second step, there is no need to enter any information. Just go tSaveve and continue.
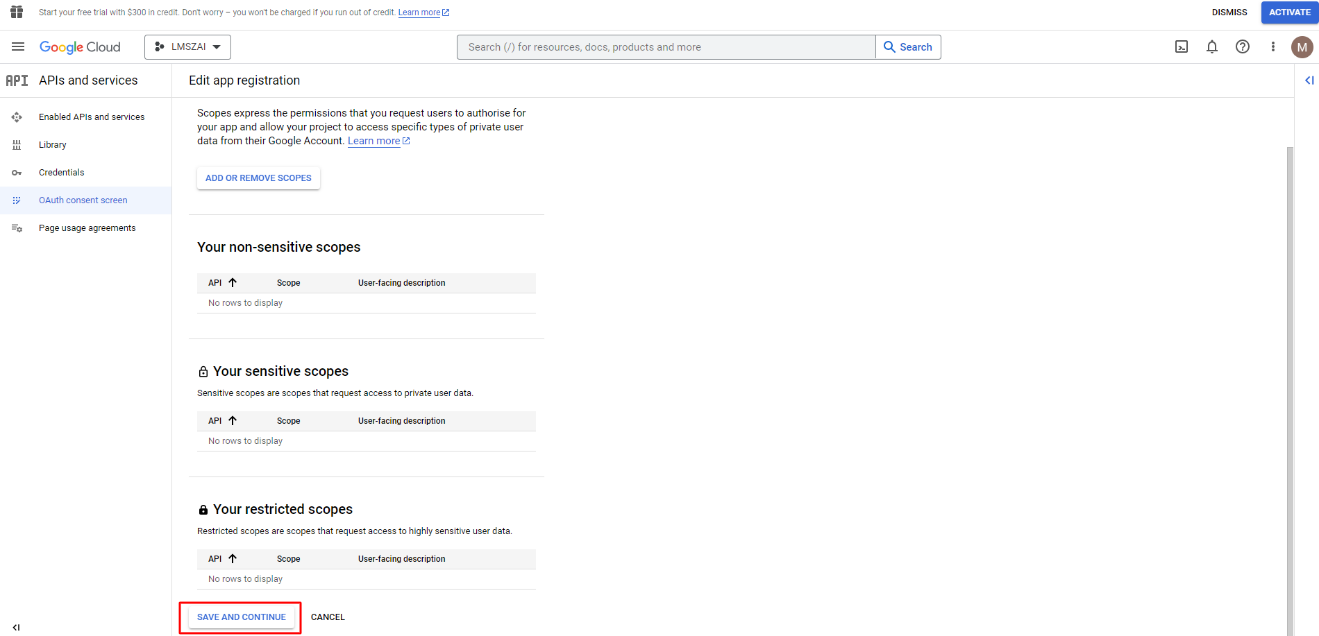
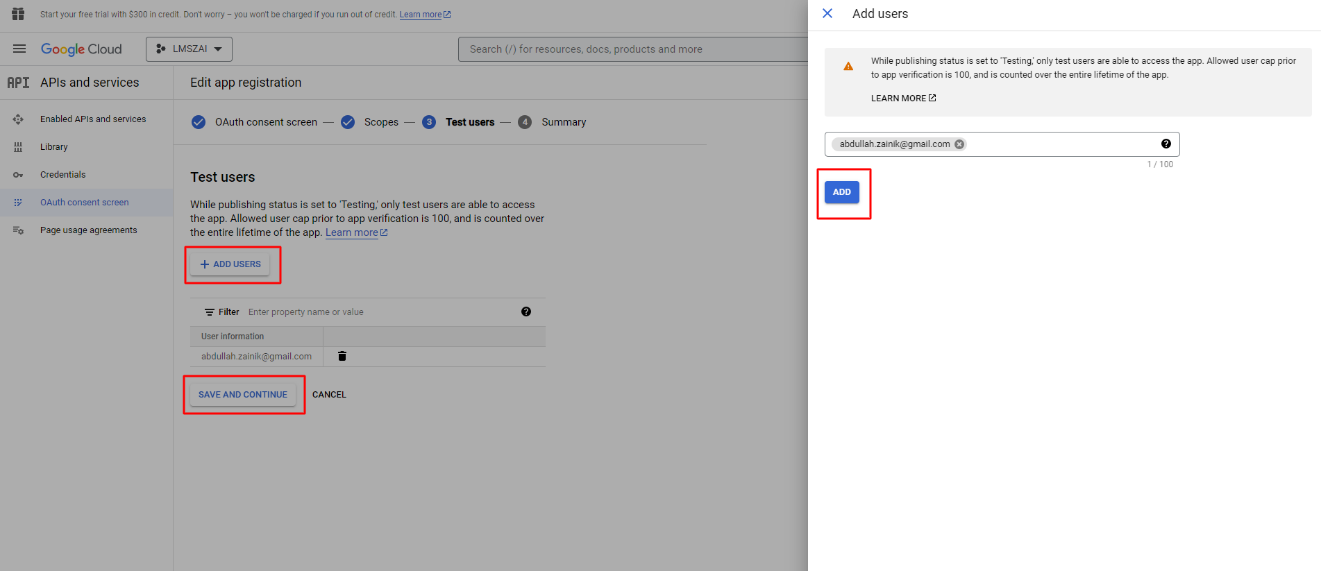
When you reach your test user, you can add the user to your particular app. Then go to Save and Continue.
Now you are configured. And you have to go to the credentials again.
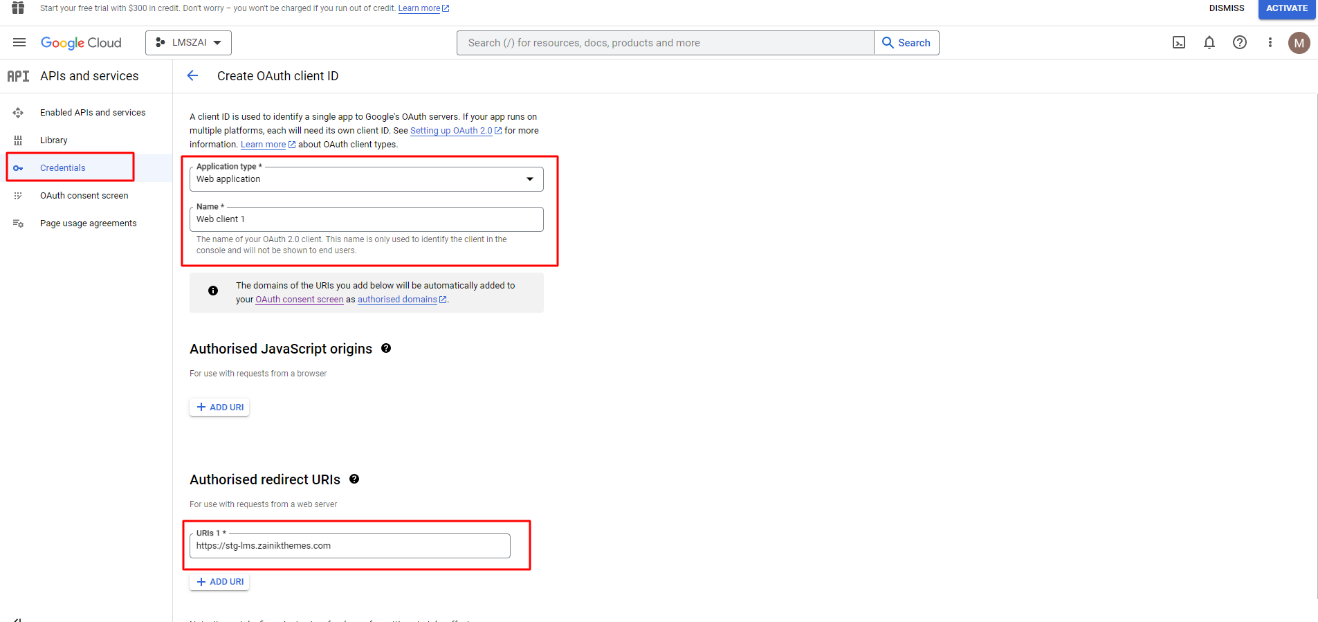
Go to the create credential page again.
Here, you have to select the application types. You also have to edit your new web name and give the URI. You have to follow the format for writing URLs.
{website URL}/auth/google/callback
For example
https://lmszai.zainikthemes.com/auth/google/callback
Go to the credential. Click the edit button
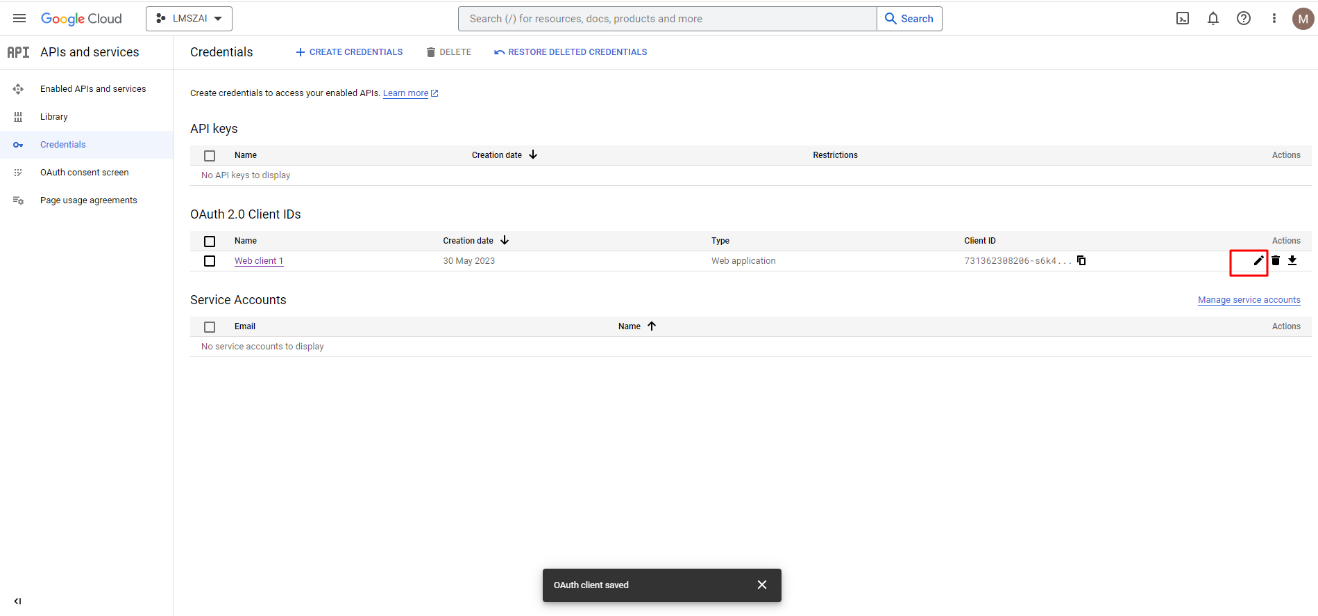
And here is your client id, client secret and URI.
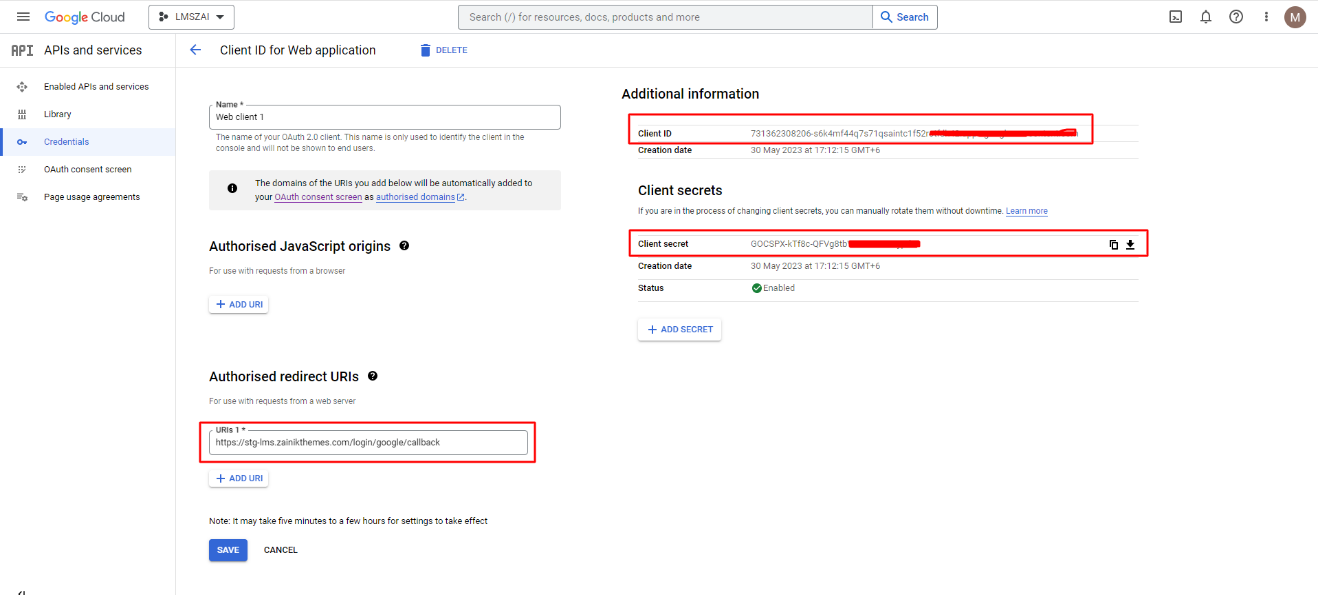
Put this information in the admin application settings and click the update button.
Social Login(Facebook)
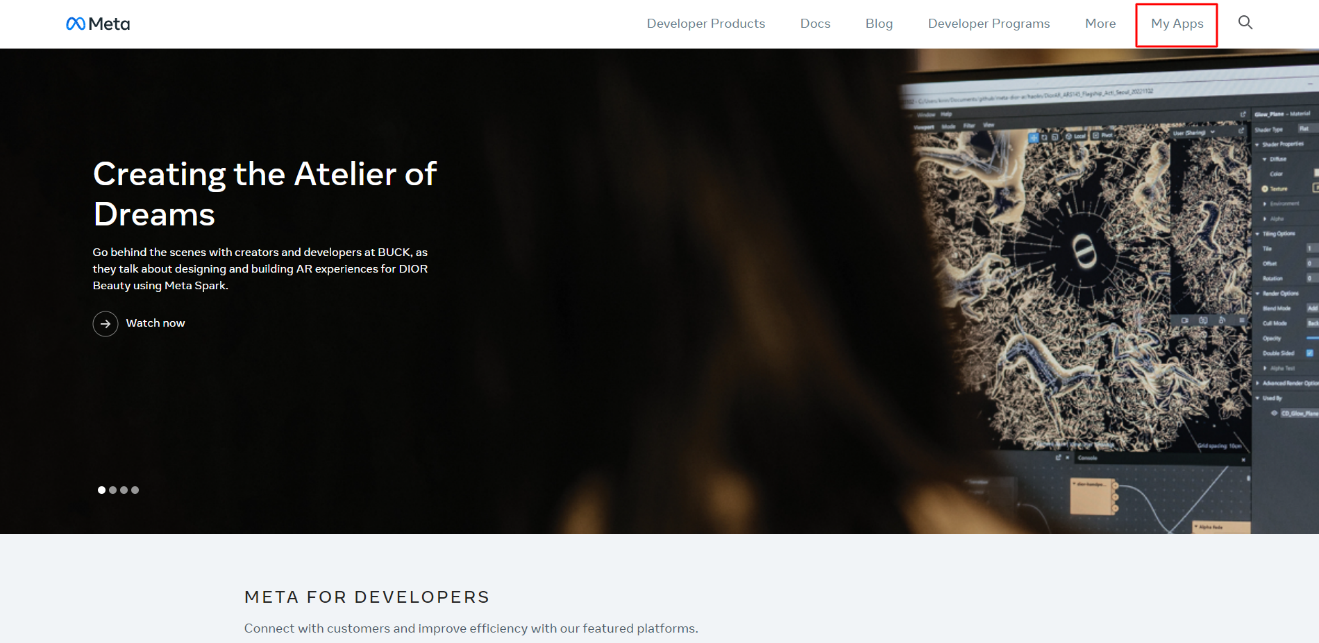
For that you need to sign in in your Facebook account. After that you have to go to the URL (developers.facebook.com). click My Apps.
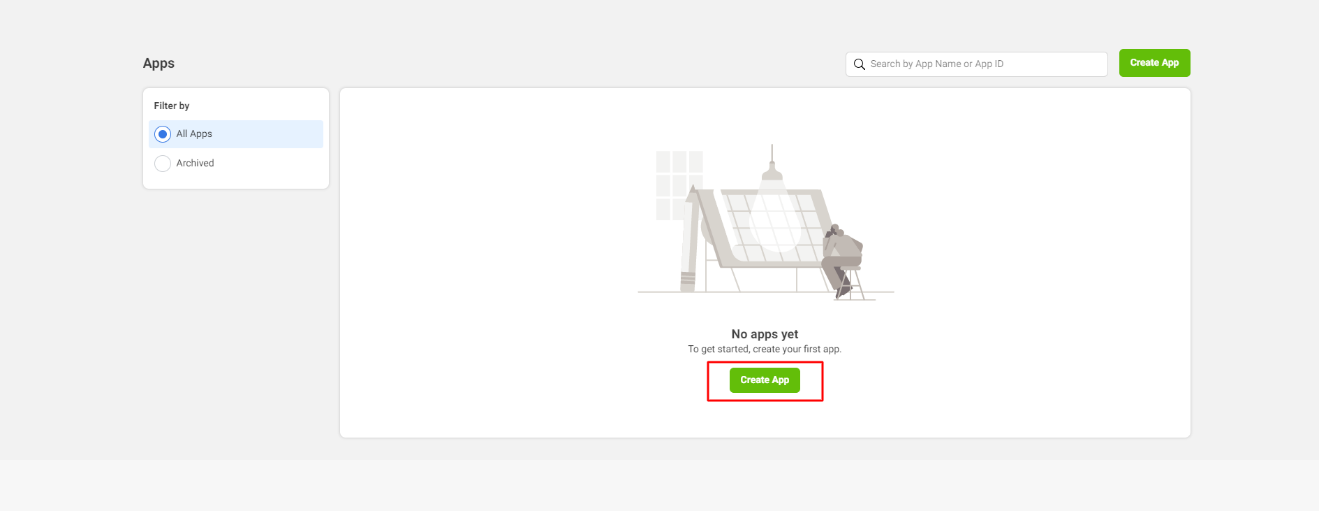
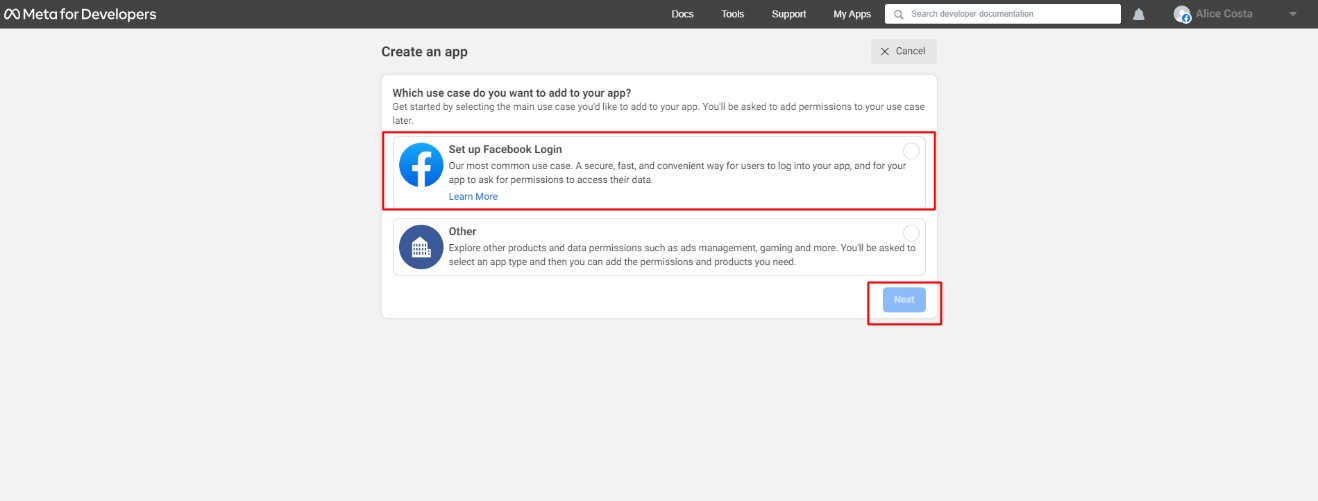
After that click the create app button.
Choose the case you want to add in your site.
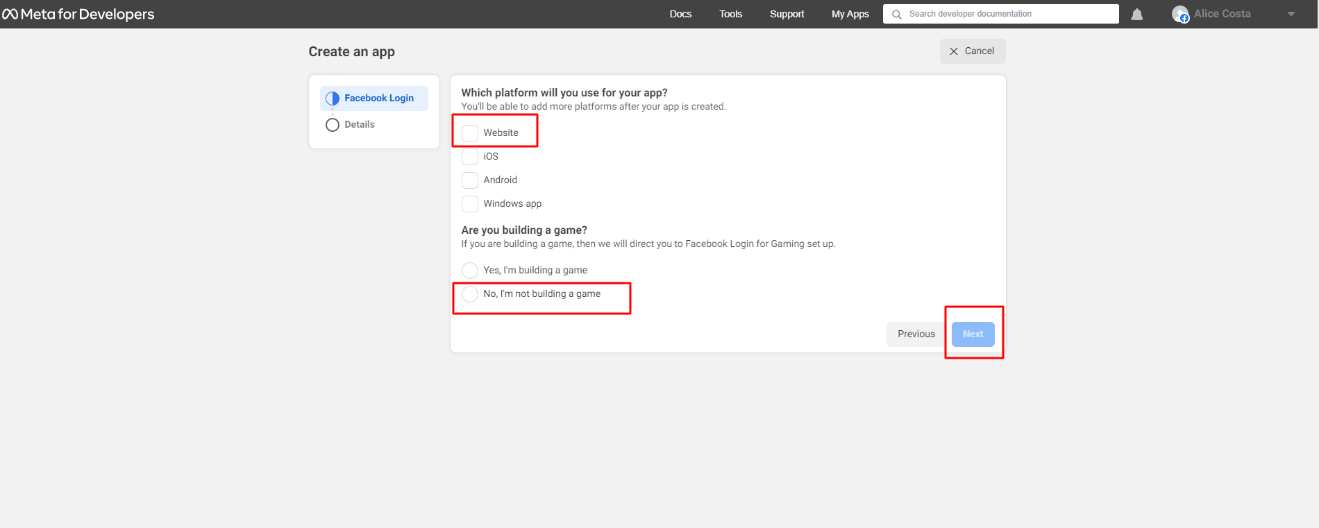
Select the platform and go next.
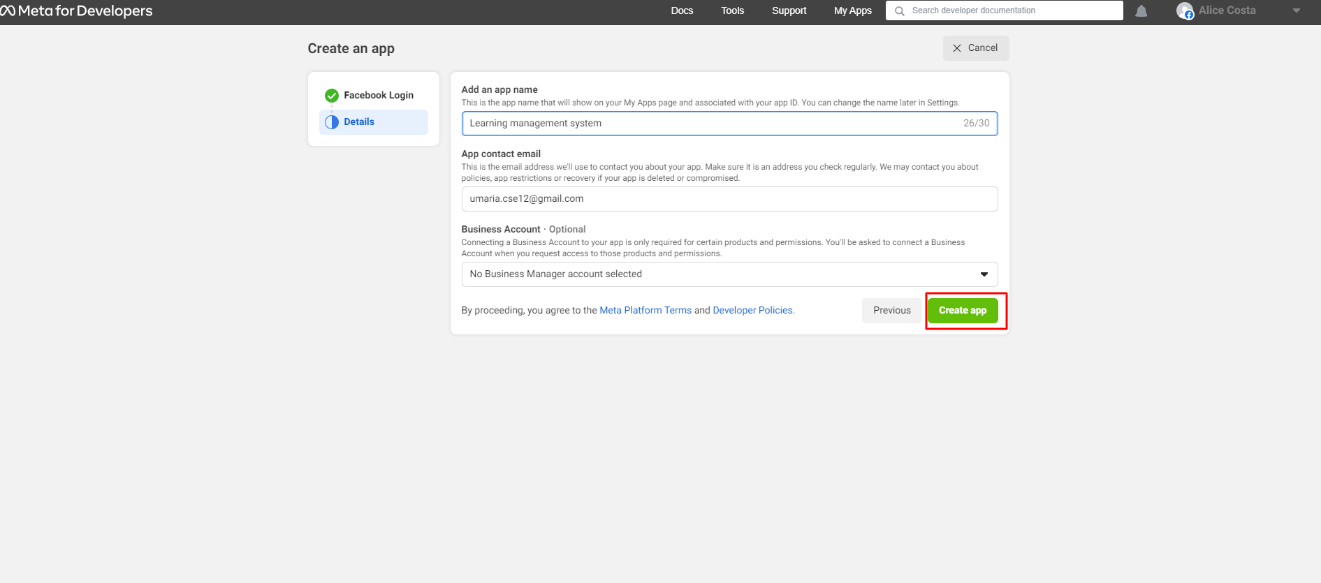
Add an app name and create the app.
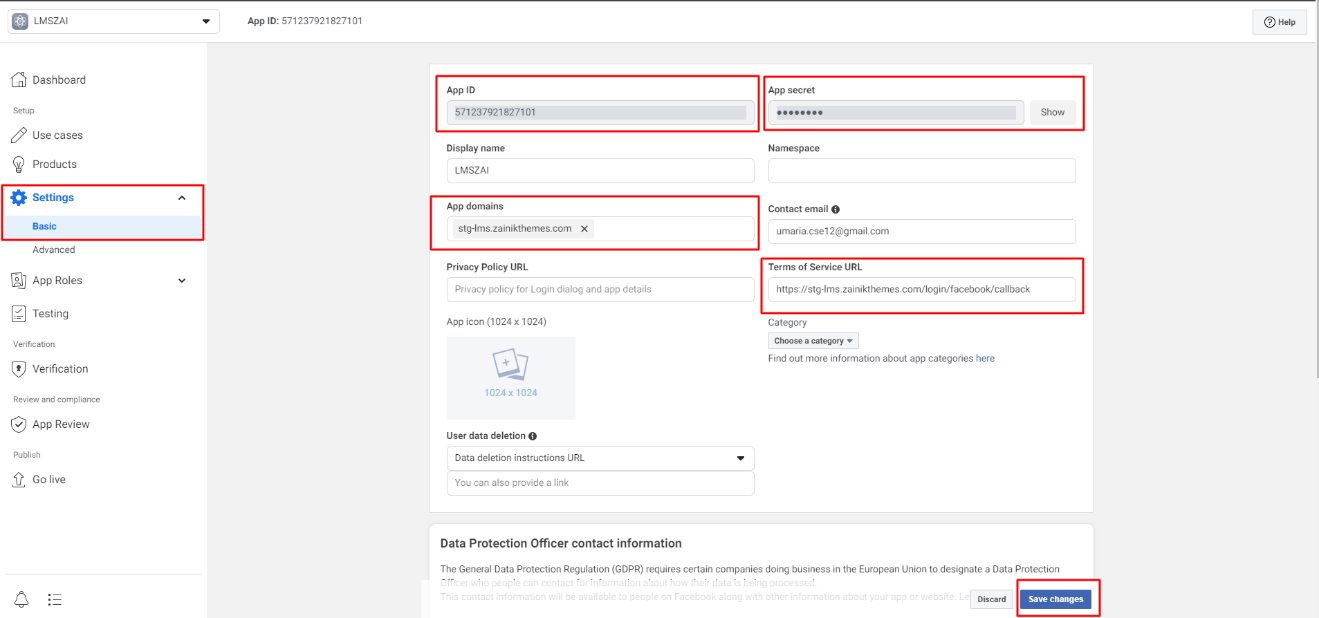
Then go to the dashboard. Go to the basics of the settings. Here is your App ID and App secret. For App secret click the show button. Put your app domain name. Set the URL. Follow this format.
{website URL}/login/facebook/callback
For example
https://lmszai.zainikthemes.com/login/facebook/callback
After that click the save changes button.
Now add this credential to the admin settings and click the update button.
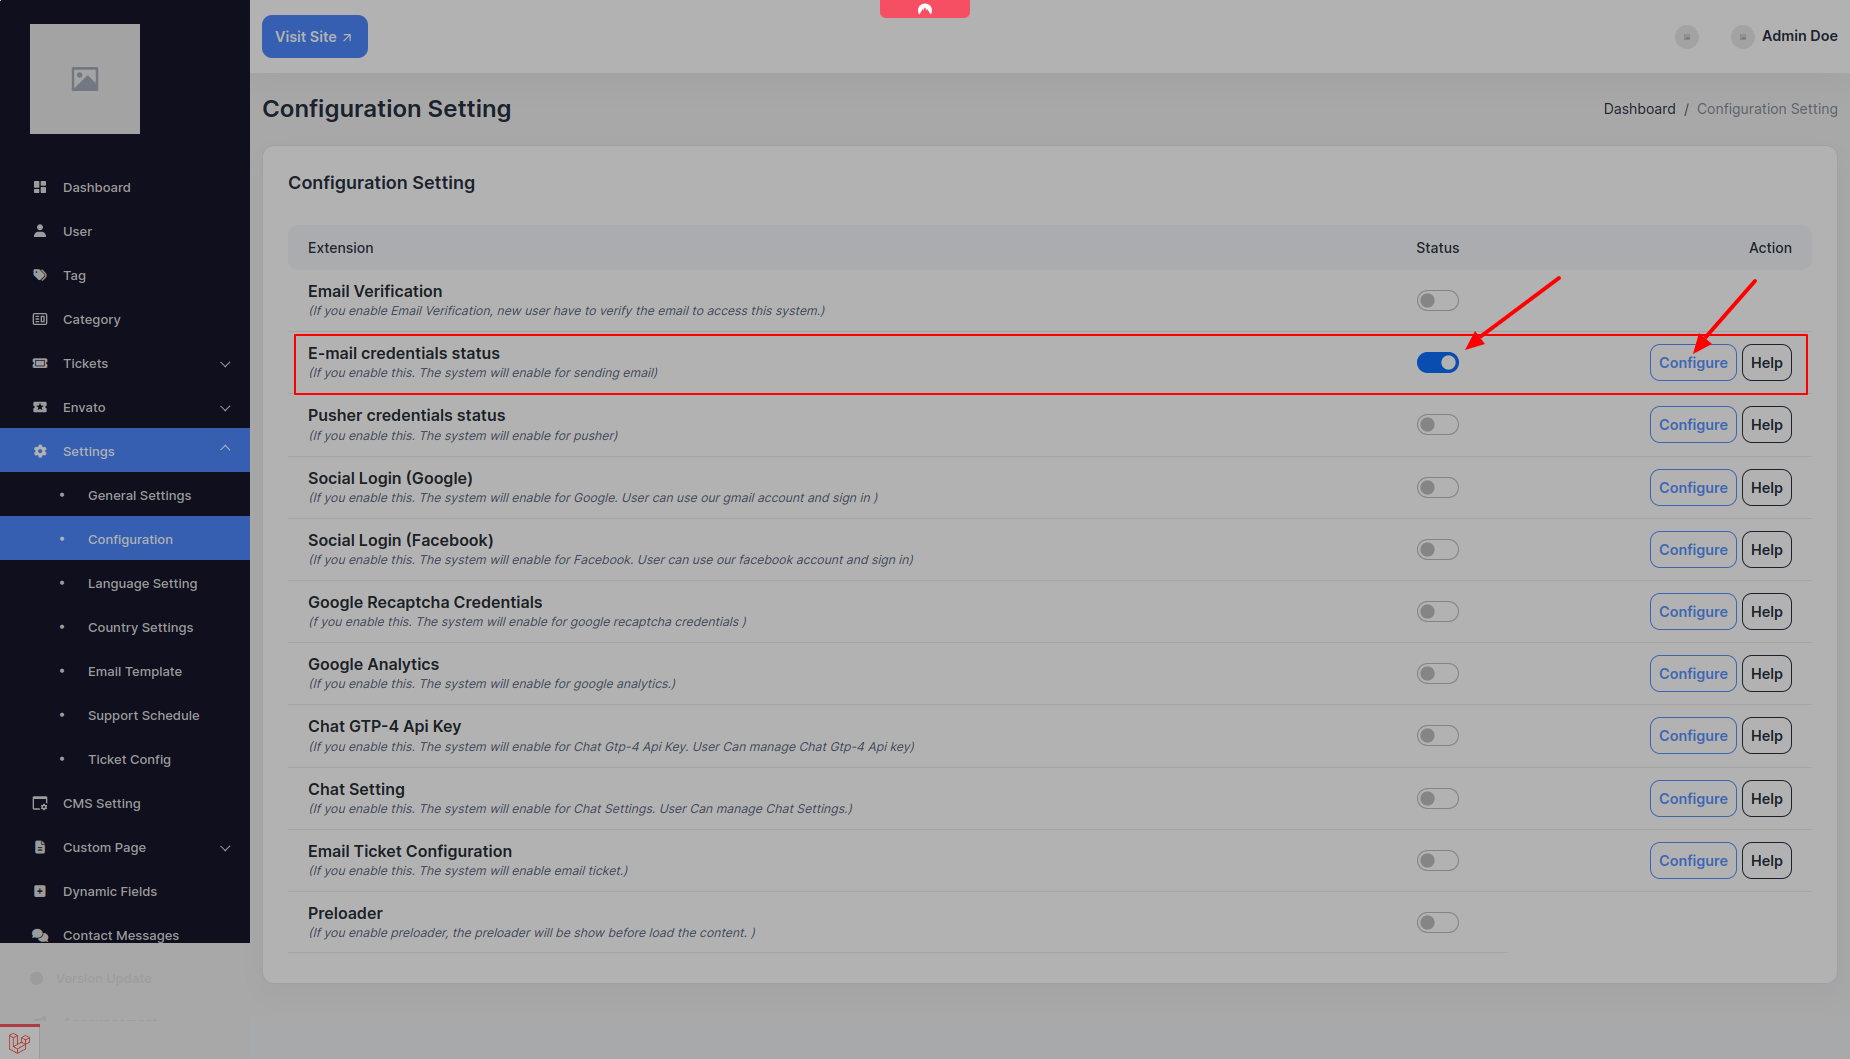
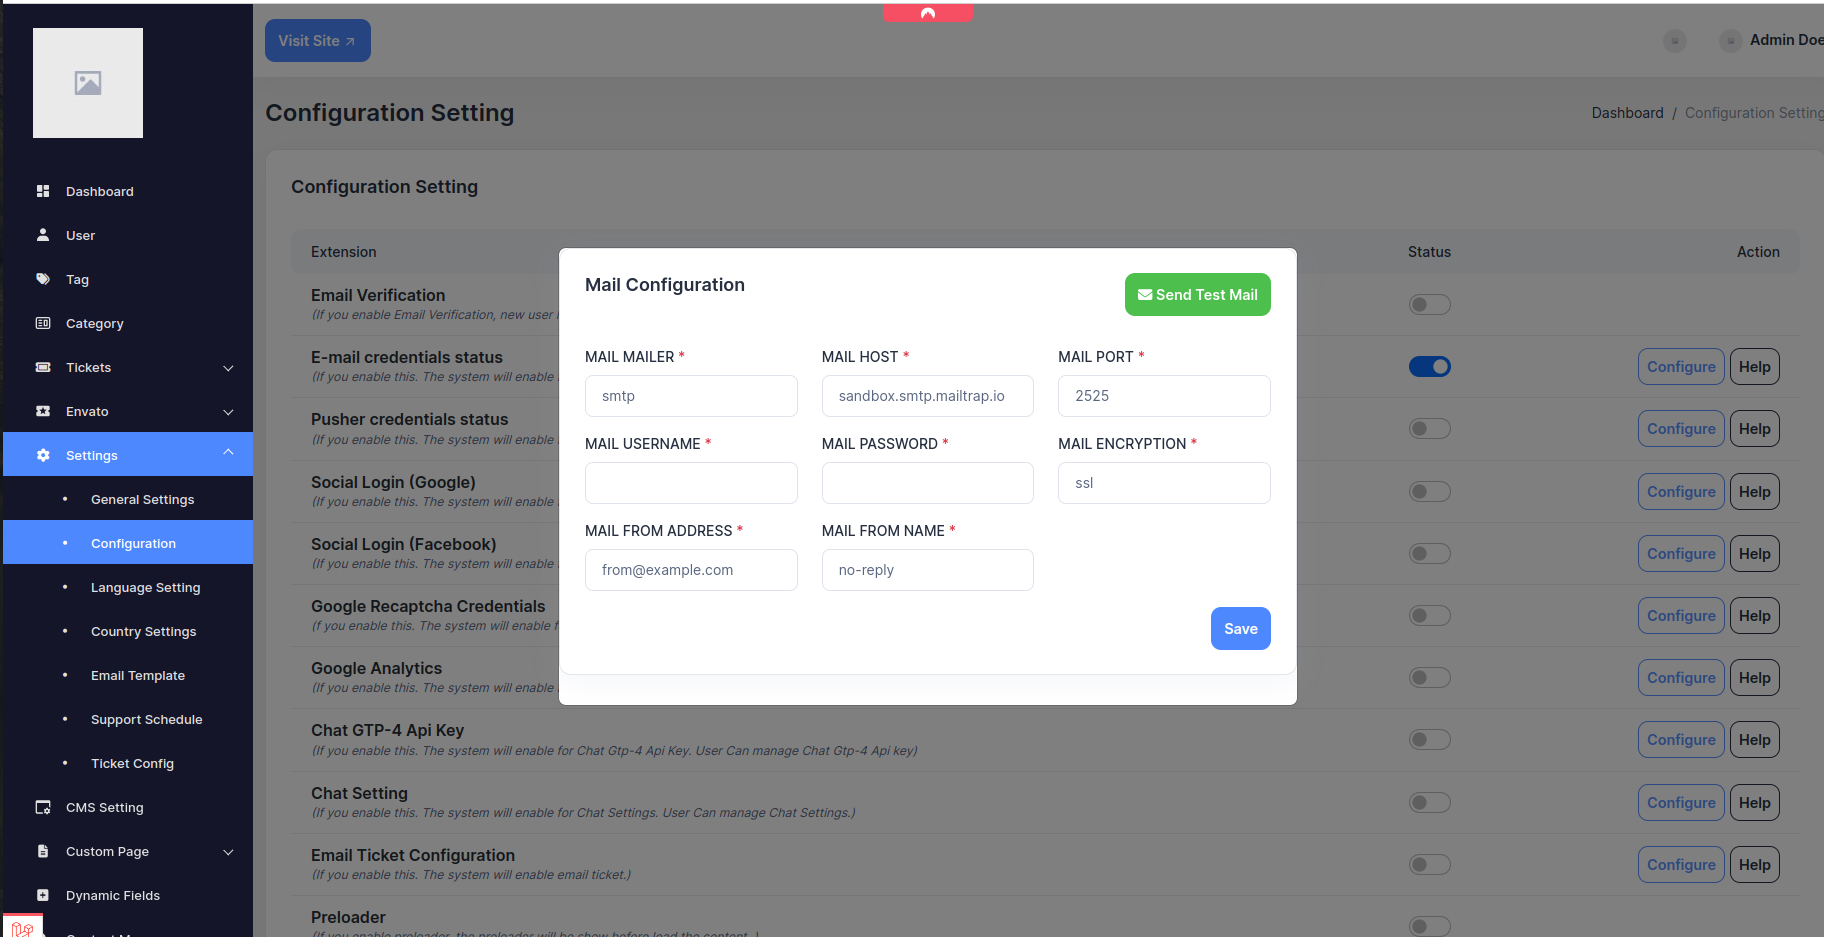
Mail Configuration
- Go to setting configure option and enable email credential status then click configuration button, set mail credential.
- If you want to setup Gmail SMTP Server Method, Follow this step
Enabling 2-step verification on your Gmail account provides an extra layer of security by requiring a second form of authentication in addition to your password. To use Gmail's SMTP server with 2-step verification, you'll need to generate an "App password," which is a special password used specifically for email clients like Outlook, Thunderbird, or for scripts
Note: Before configuring Google’s SMTP server, you need to follow these steps if you have two-step verification enabled on your Google email account:
- a. How to Set Up App Passwords
If you use 2-step verification on your Google account and your mail client doesn’t support verification codes, you’ll have to enable App Passwords before configuring the Google SMTP server settings.
Why should you do this?
Some secure apps can be blocked from accessing your mail account due to two-step verification. An app specific password allows the blocked app or device to access your mail account.
If you don’t have two factor authentication enabled, you can skip the instructions given below.
Here’s a quick tutorial on how to create an app specific password:
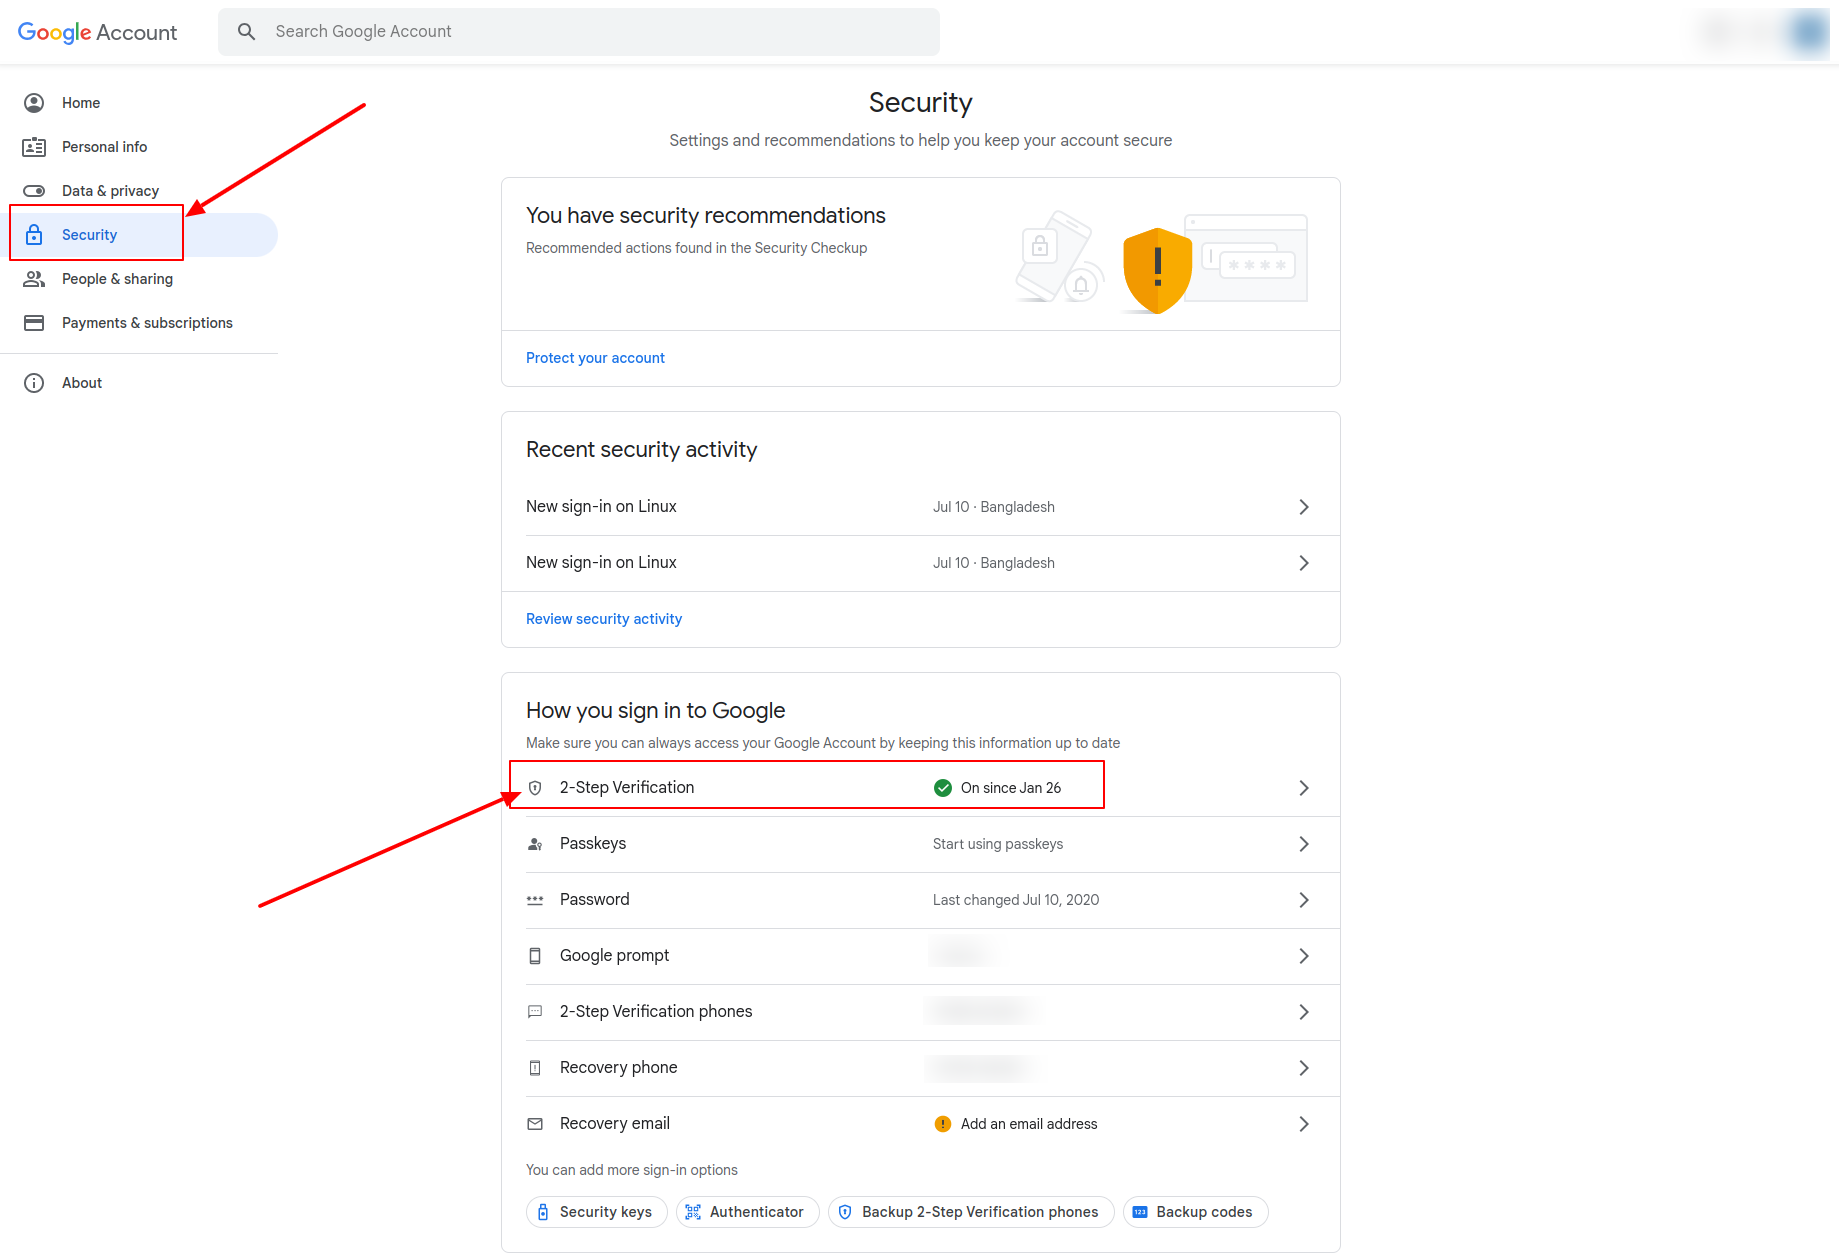
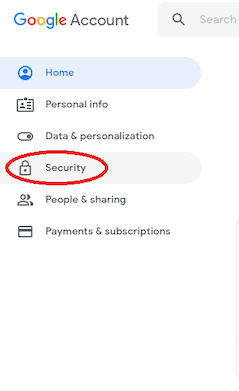
-
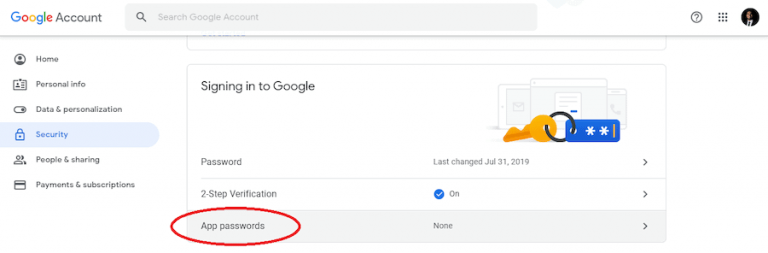
Go to your Google Account and choose Security on the left panel.
-
On the Signing in to Google tab, select App Passwords.
If you don’t see this option, it might mean that:
- Two-step verification is not set up for your Google account.
- Two-step verification is set up for security keys only.
- Your account is used through work, school, or another organization.
- You’ve turned on Advanced Protection for your account.
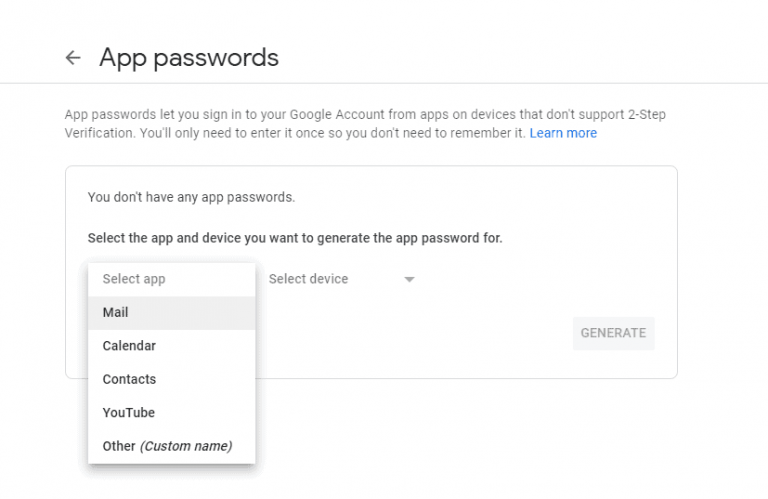
3.Click on Select app and pick the app you’re using.
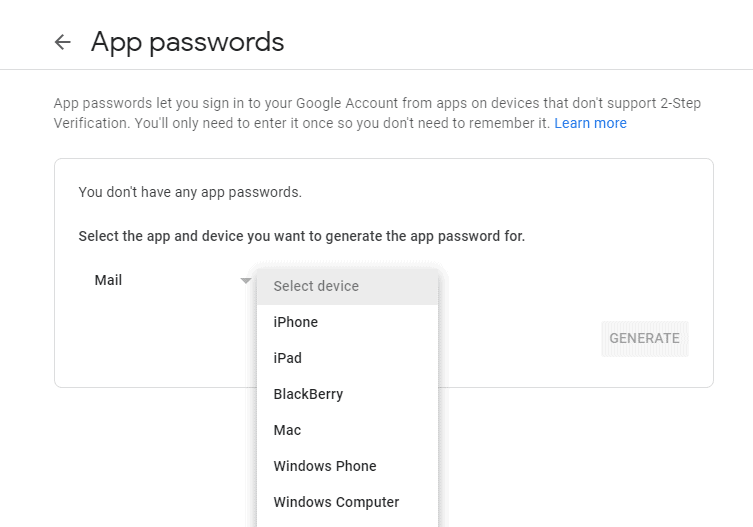
4.Click Select device and choose the device you’re using.
5.Click on Generate.
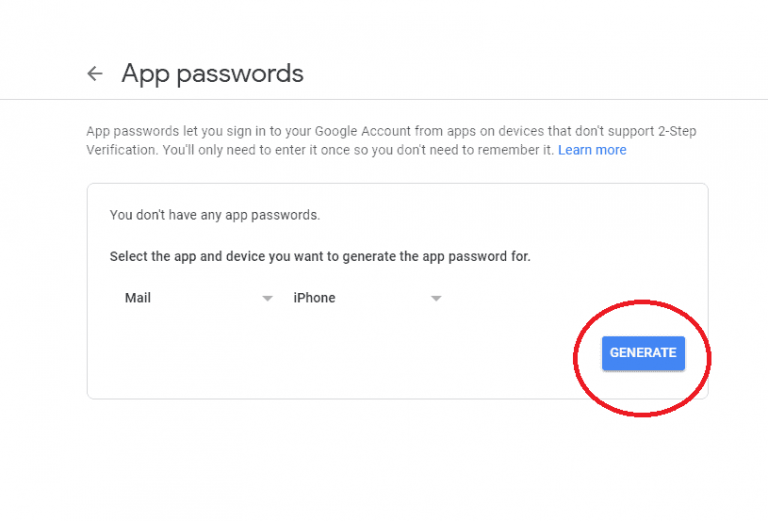
6.Follow the instructions to enter the App Password. The App Password is the 16-character code in the yellow bar on
your device.
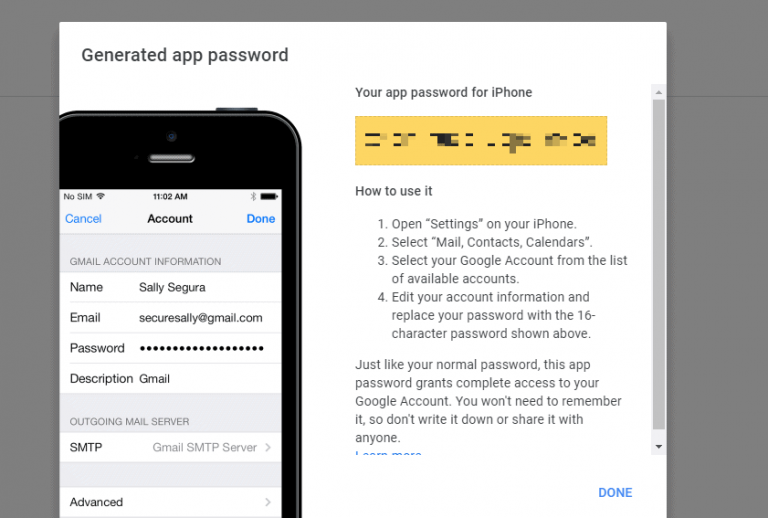
7.Click on Done
Note: You won’t have to remember your App Password since you’ll probably use it just once to connect your account to the app.
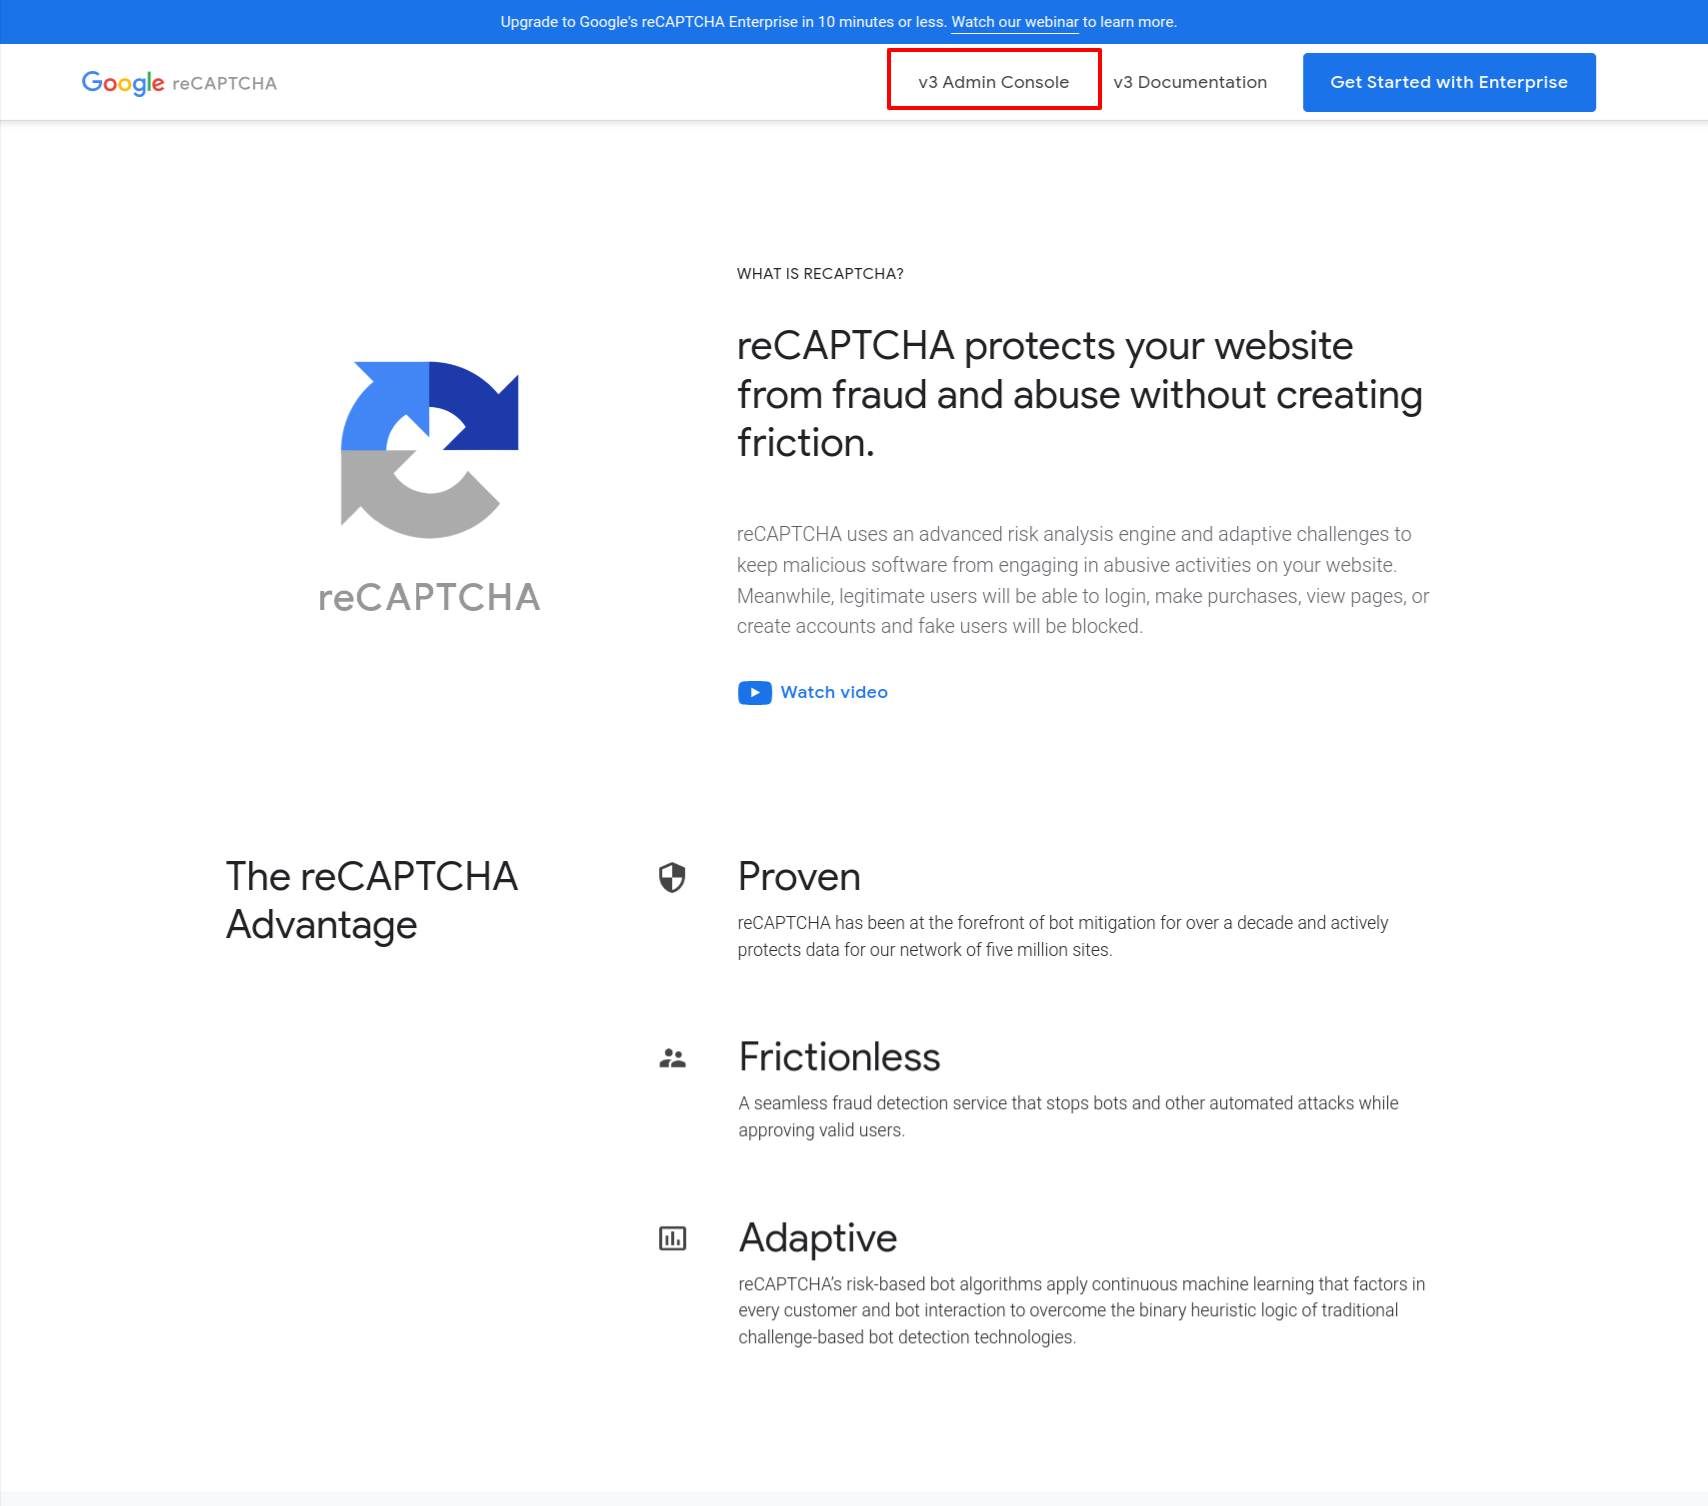
Google Recaptcha Credentials
Note that Google's interface may change over time, so it's always a good idea to refer to the official Google reCAPTCHA documentation for the most up-to-date instructions.
- Go to the https://www.google.com/recaptcha and click on the "V3 Admin Console" button to sign in with your
Google account.
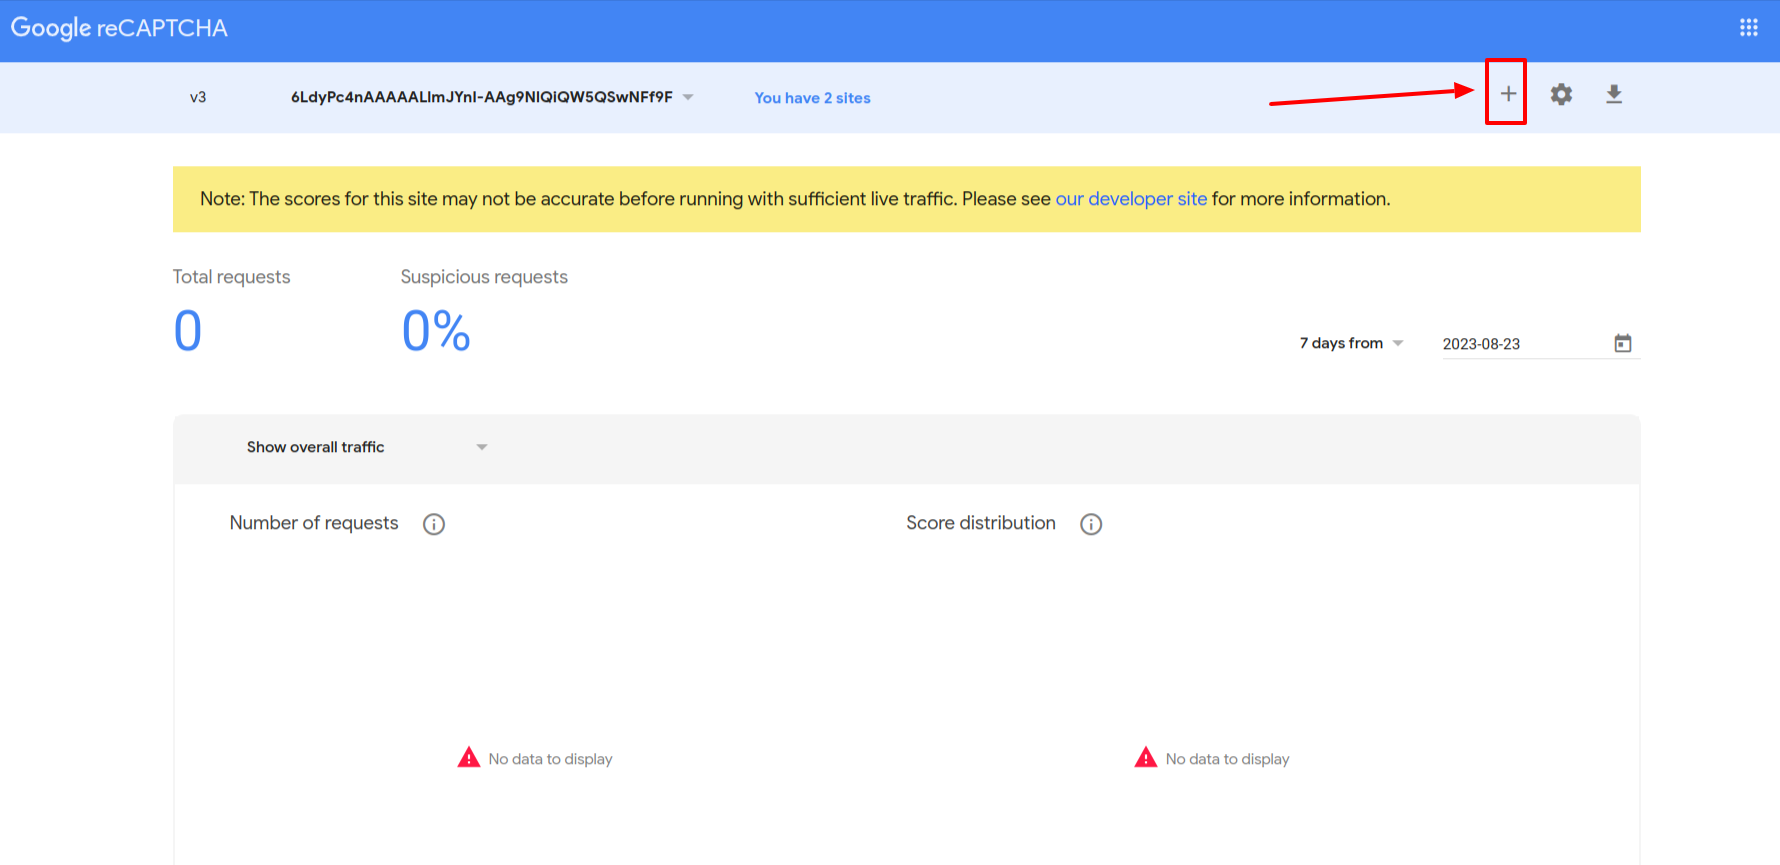
-
Once you're logged in, click on the "+ icon" to add a new site.
-
Choose between reCAPTCHA v2 or reCAPTCHA v3, depending on your requirements.
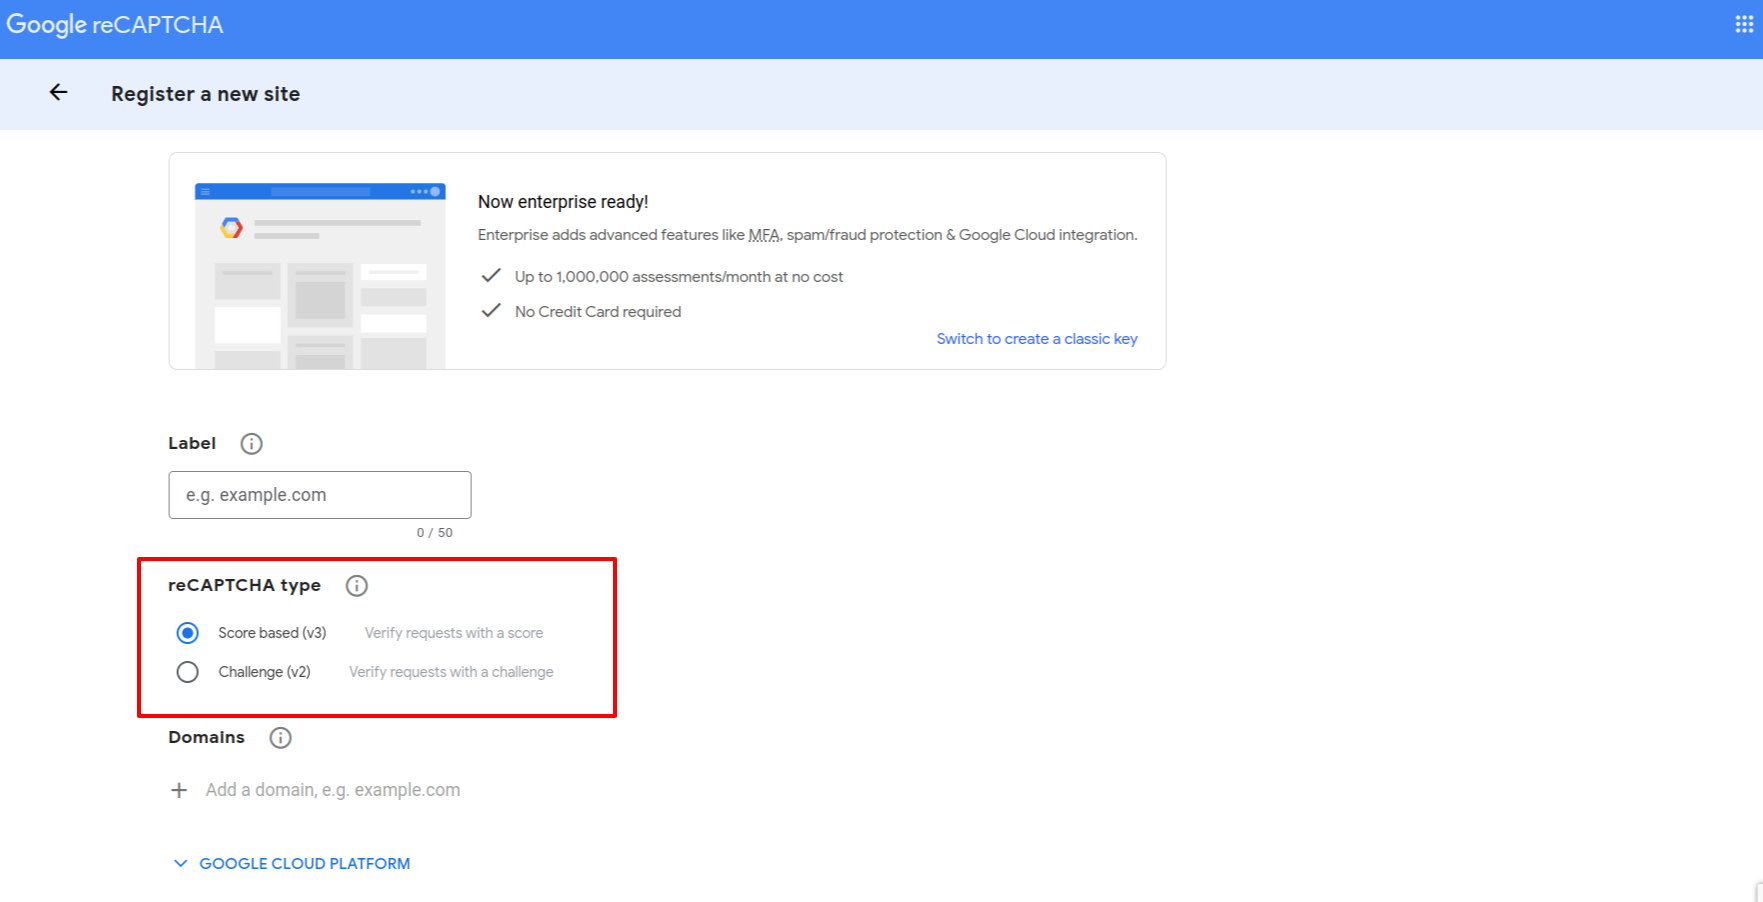
- Provide a label for your site (for your reference) and specify the domain(s) where you plan to use reCAPTCHA.
Accept the terms of service.And hit the Submit Button .
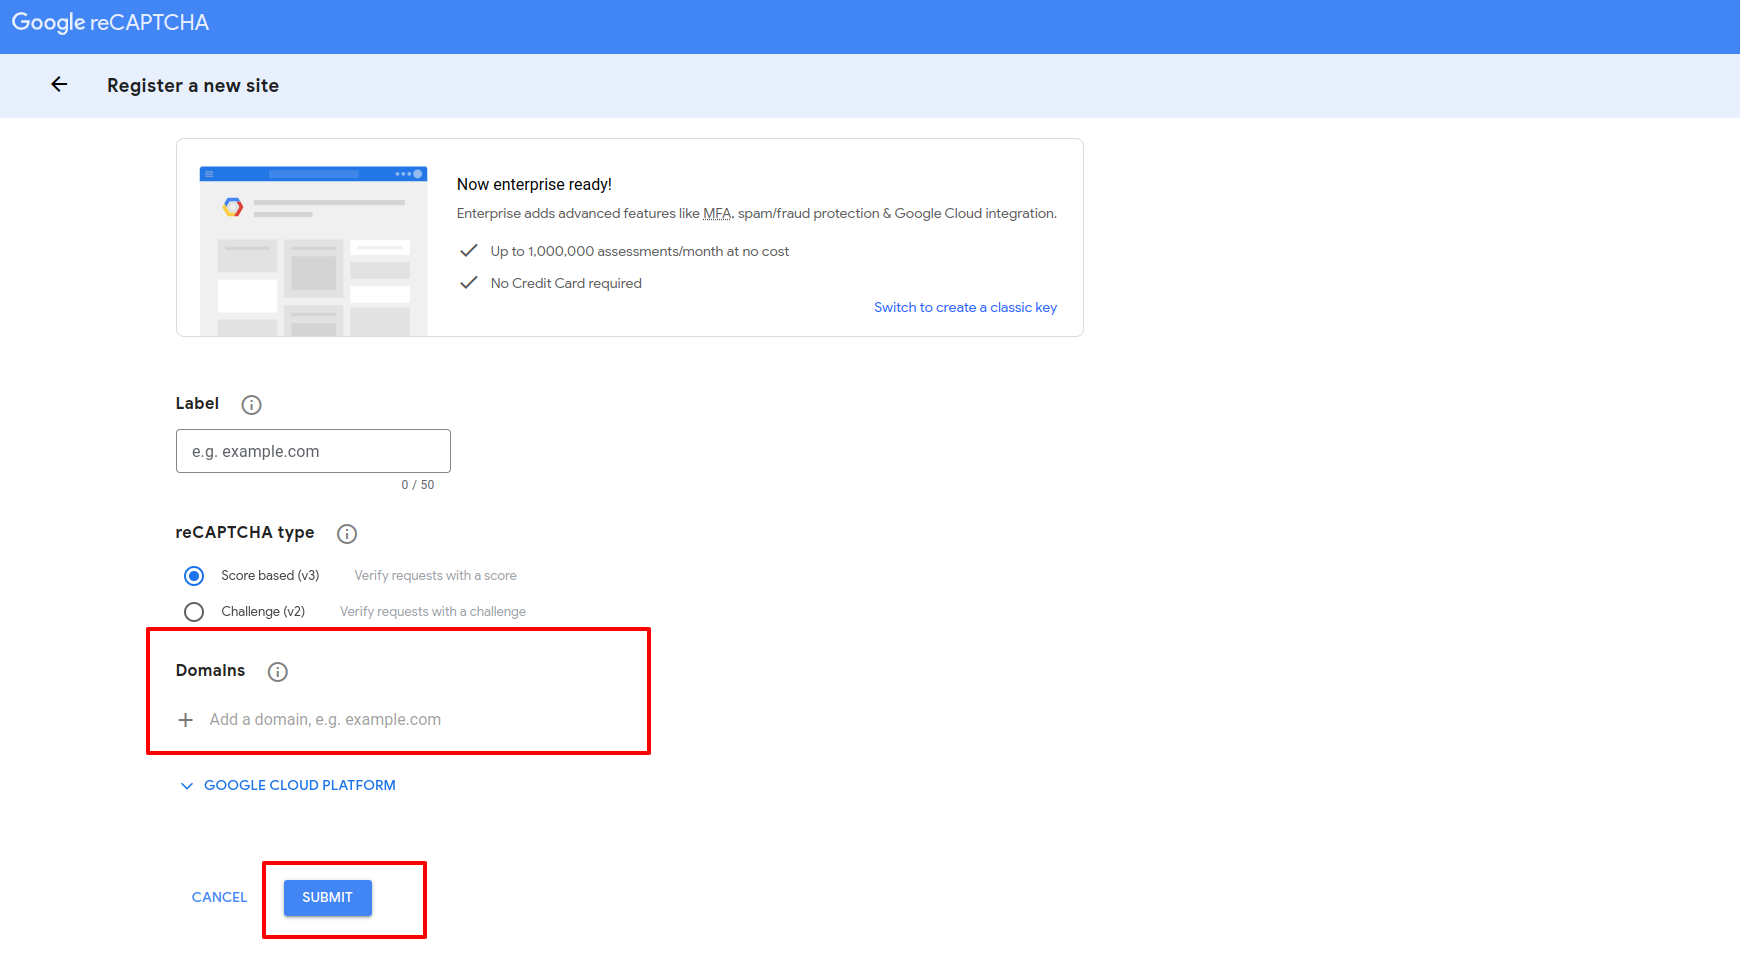
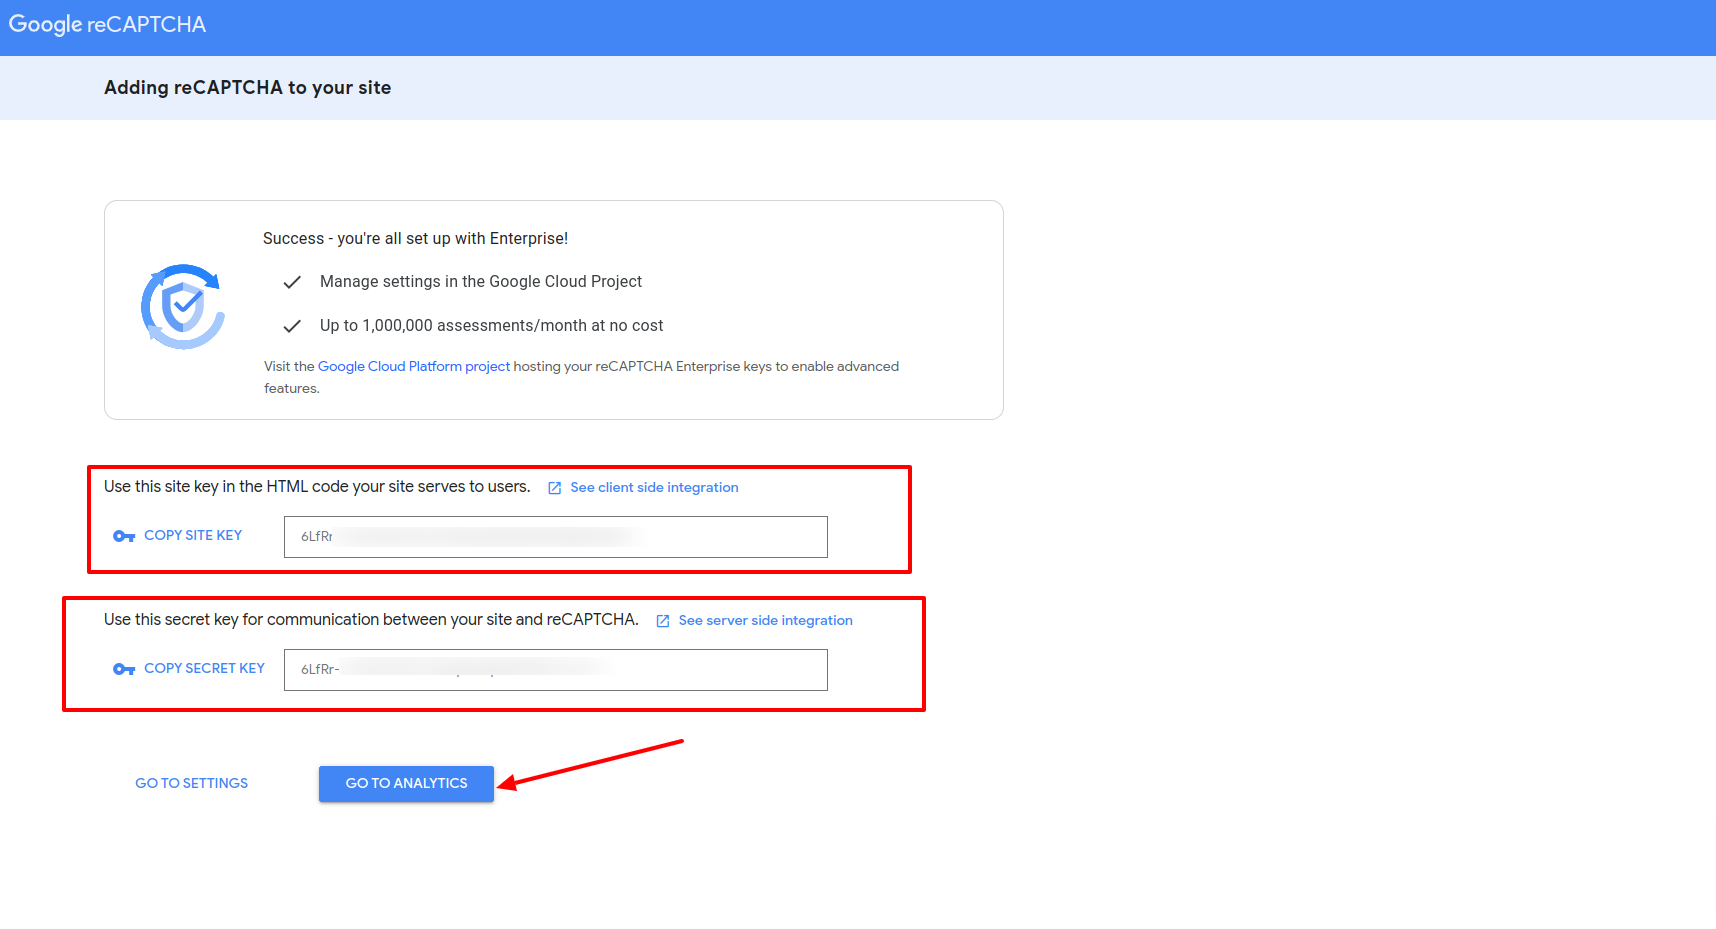
- You'll need to accept the reCAPTCHA Terms of Service to proceed. Make sure you read and understand these terms.Upon
successful registration, Google will provide you with two keys - a "Site Key or secret Key"
Pusher credentials status
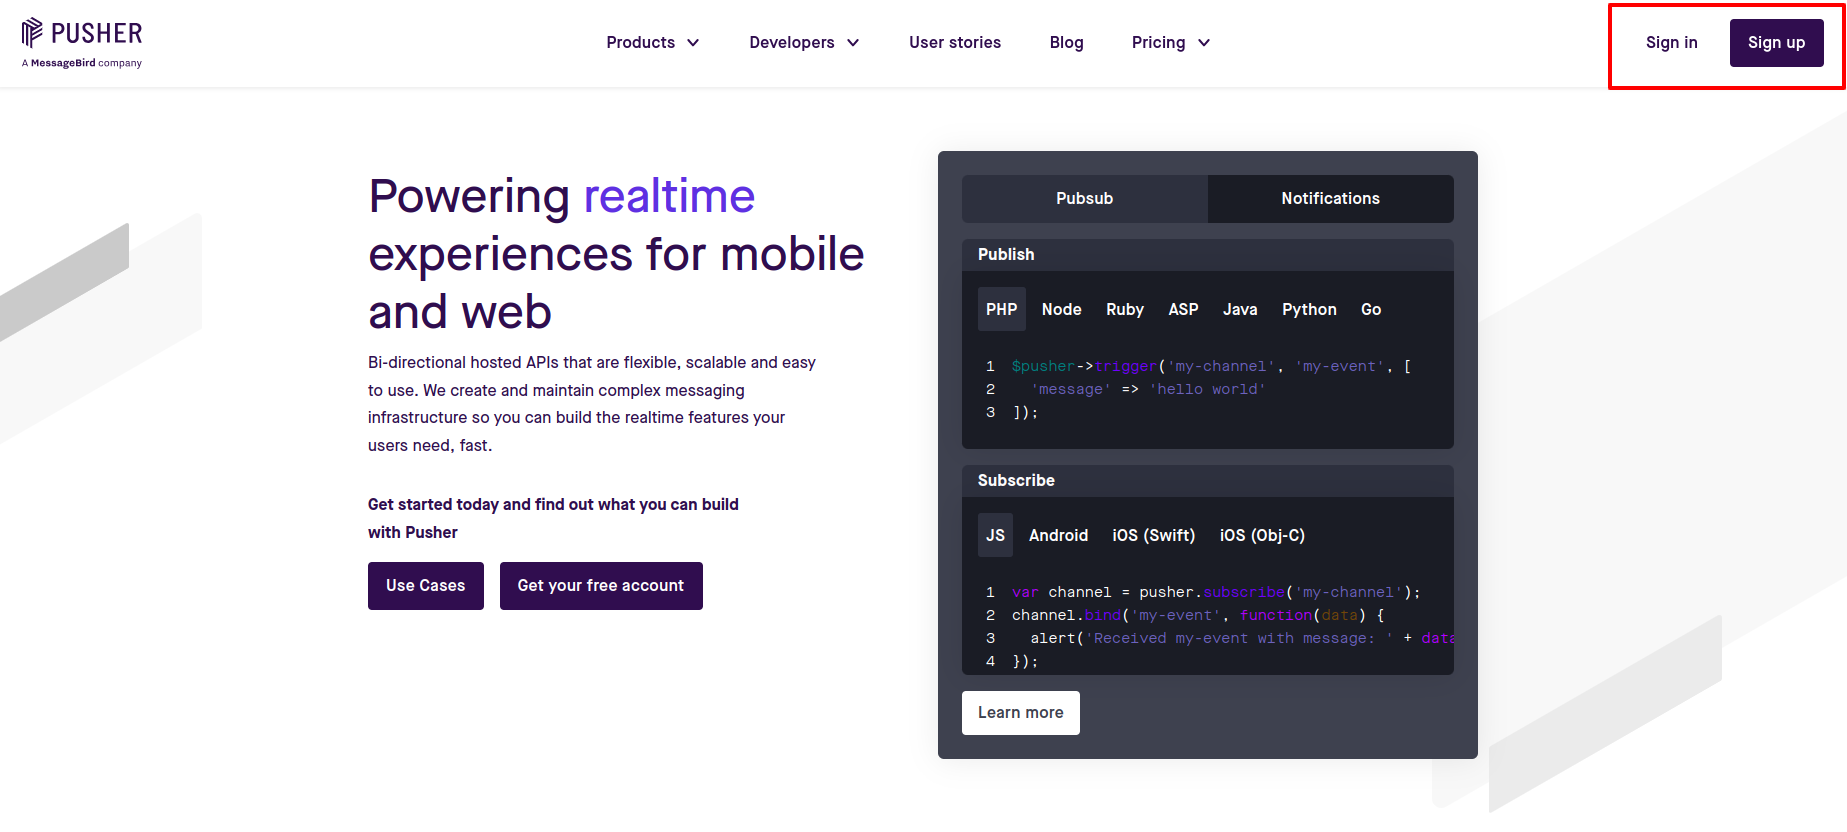
1.Go to the https://pusher.com and sign in to your account. If you don't have an account, you'll need to sign up
first.
2.Once you're logged in, click on the "Marge".
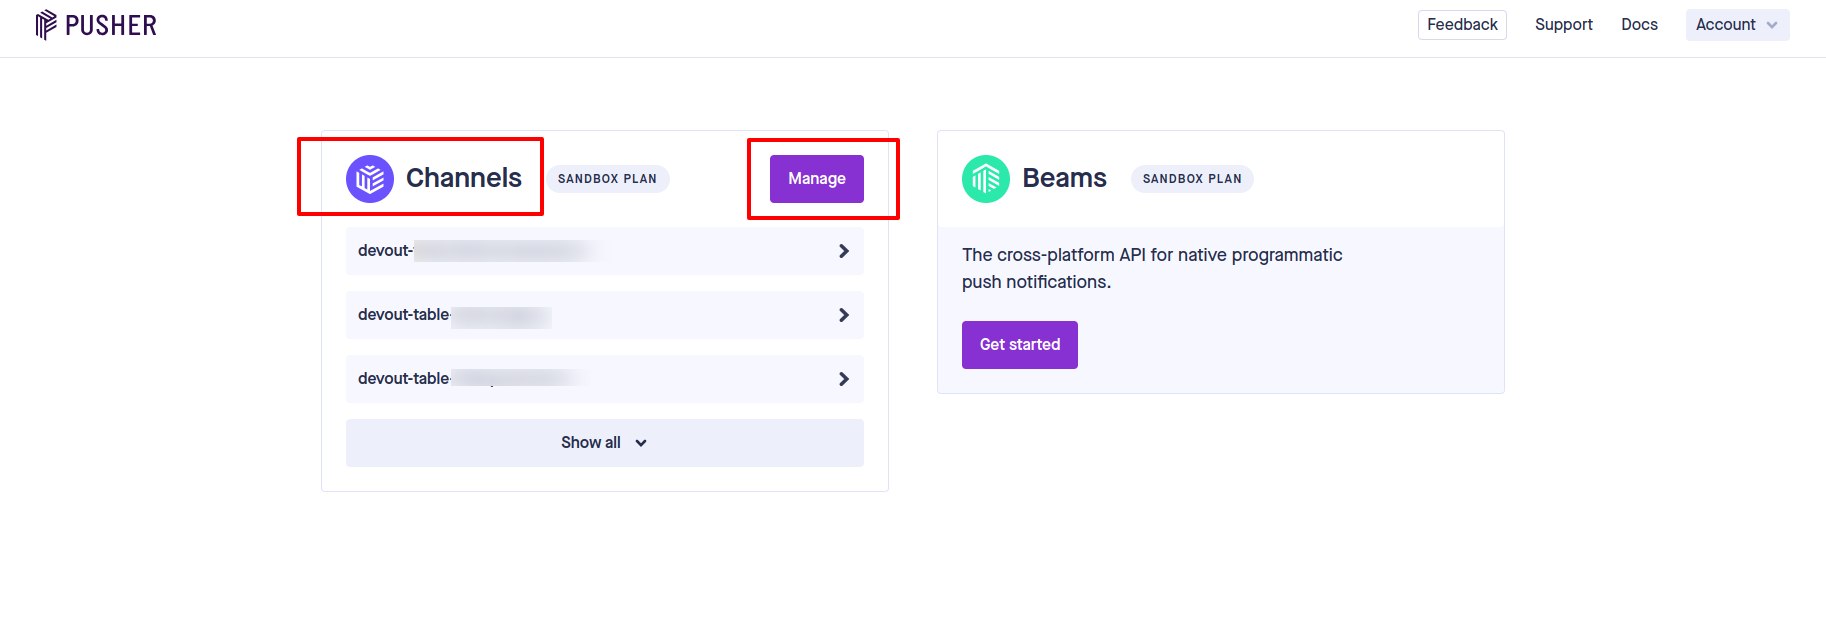
3.Once you're logged in, click on the "Create App". button or a similar option to initiate the app creation process.
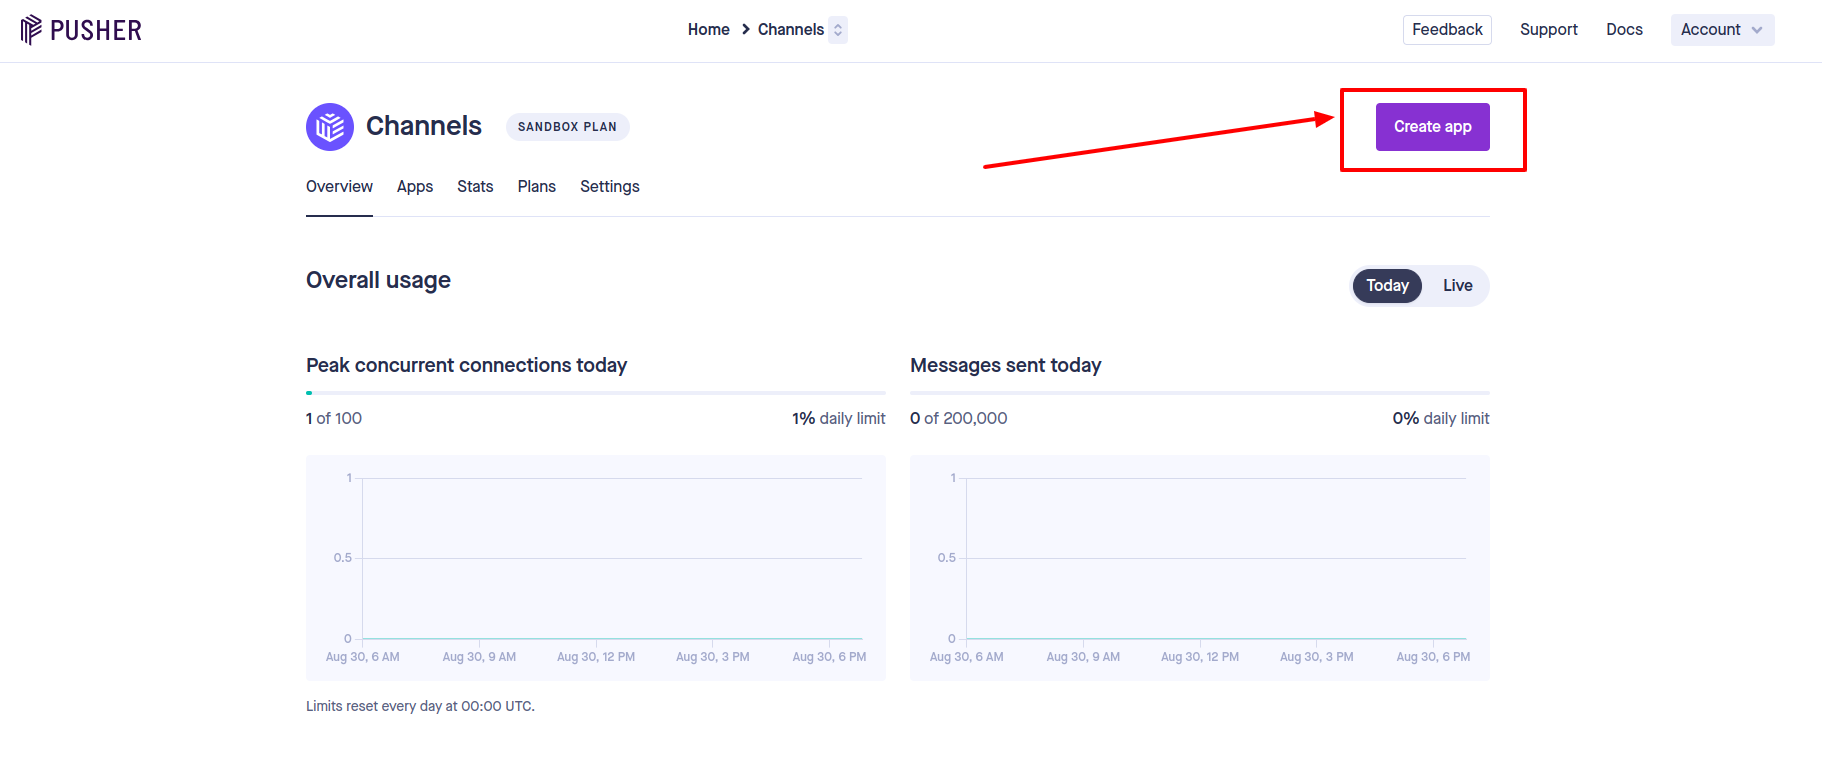
4.Provide a name for your app and select the environment you're building for (production, development, etc.).
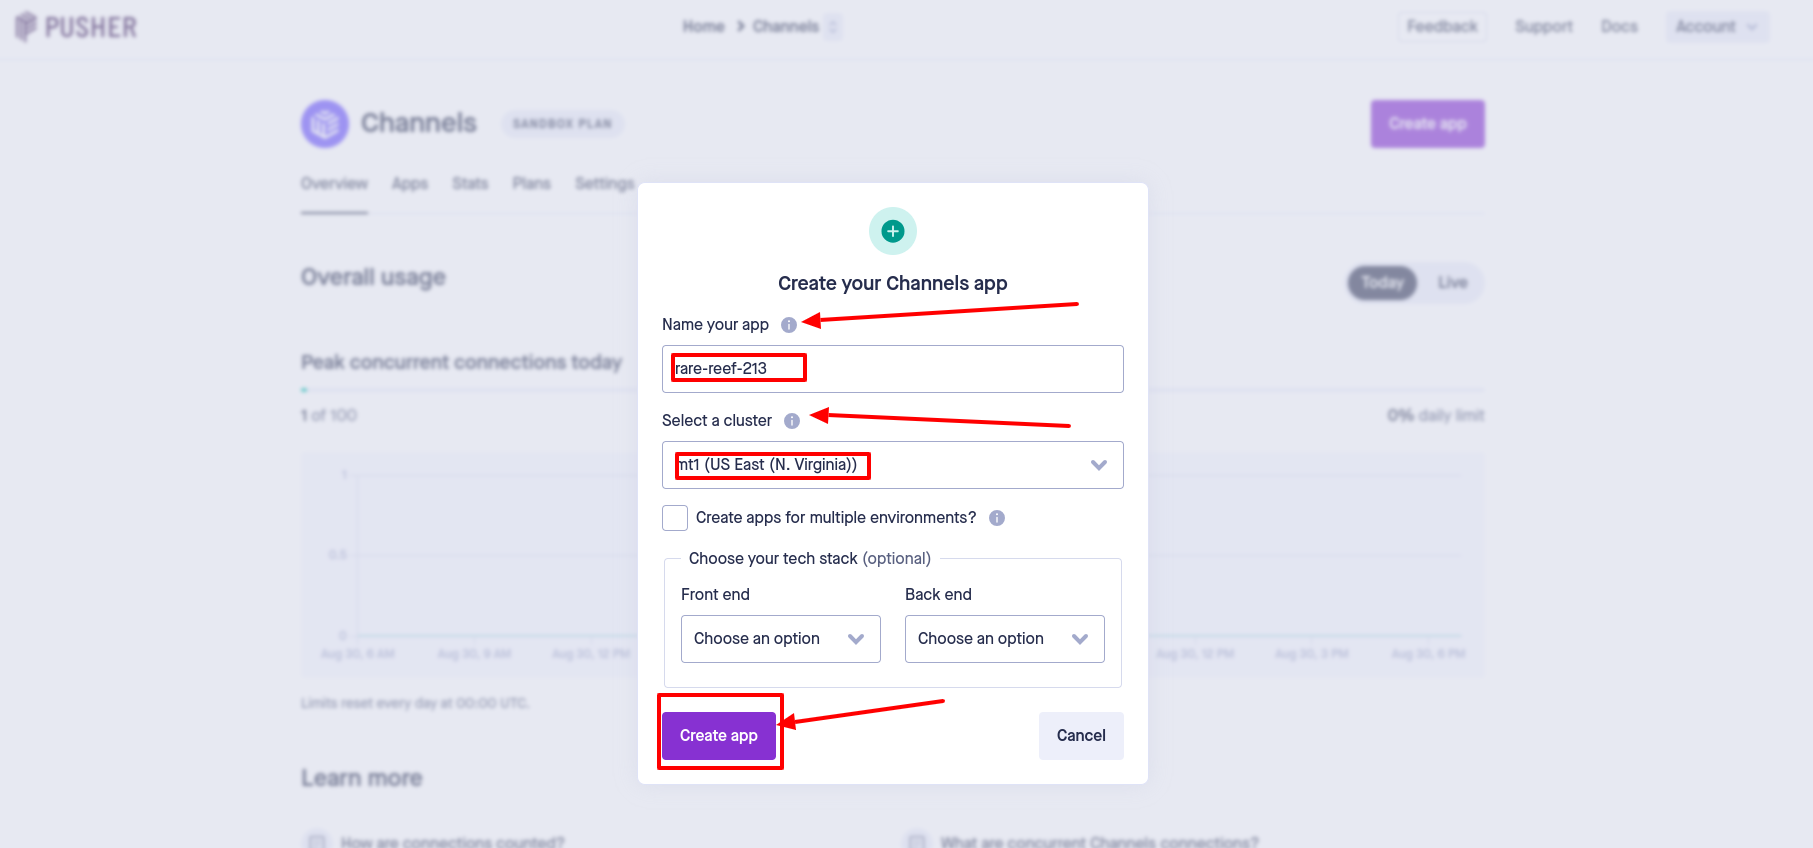
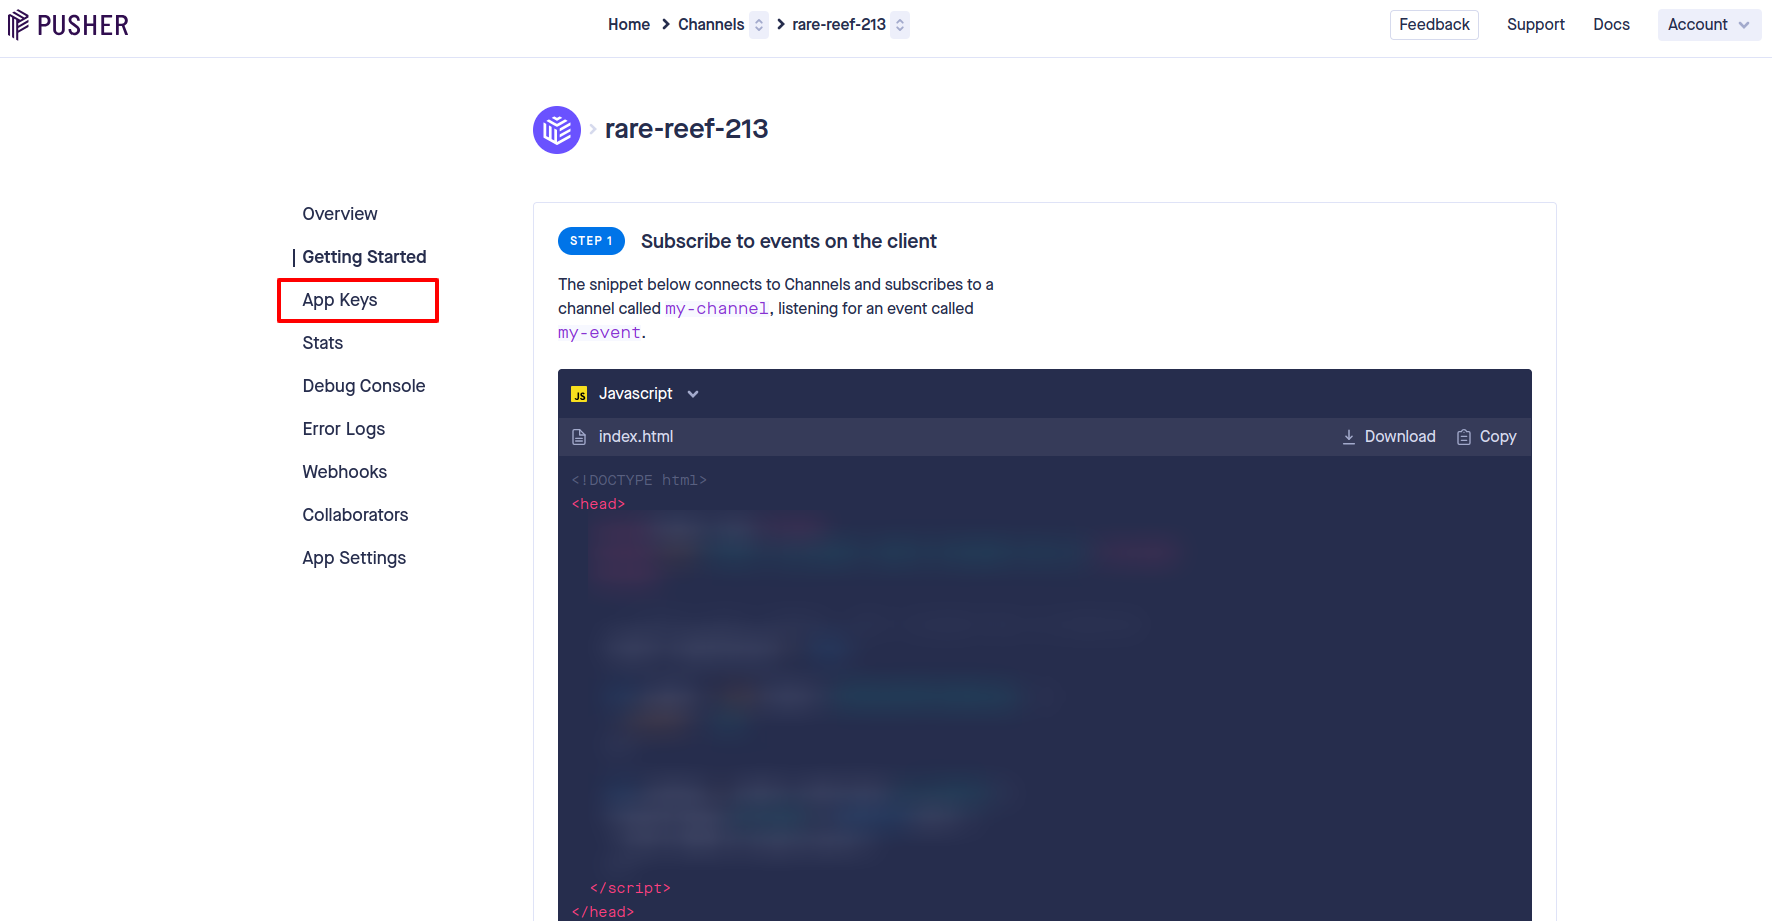
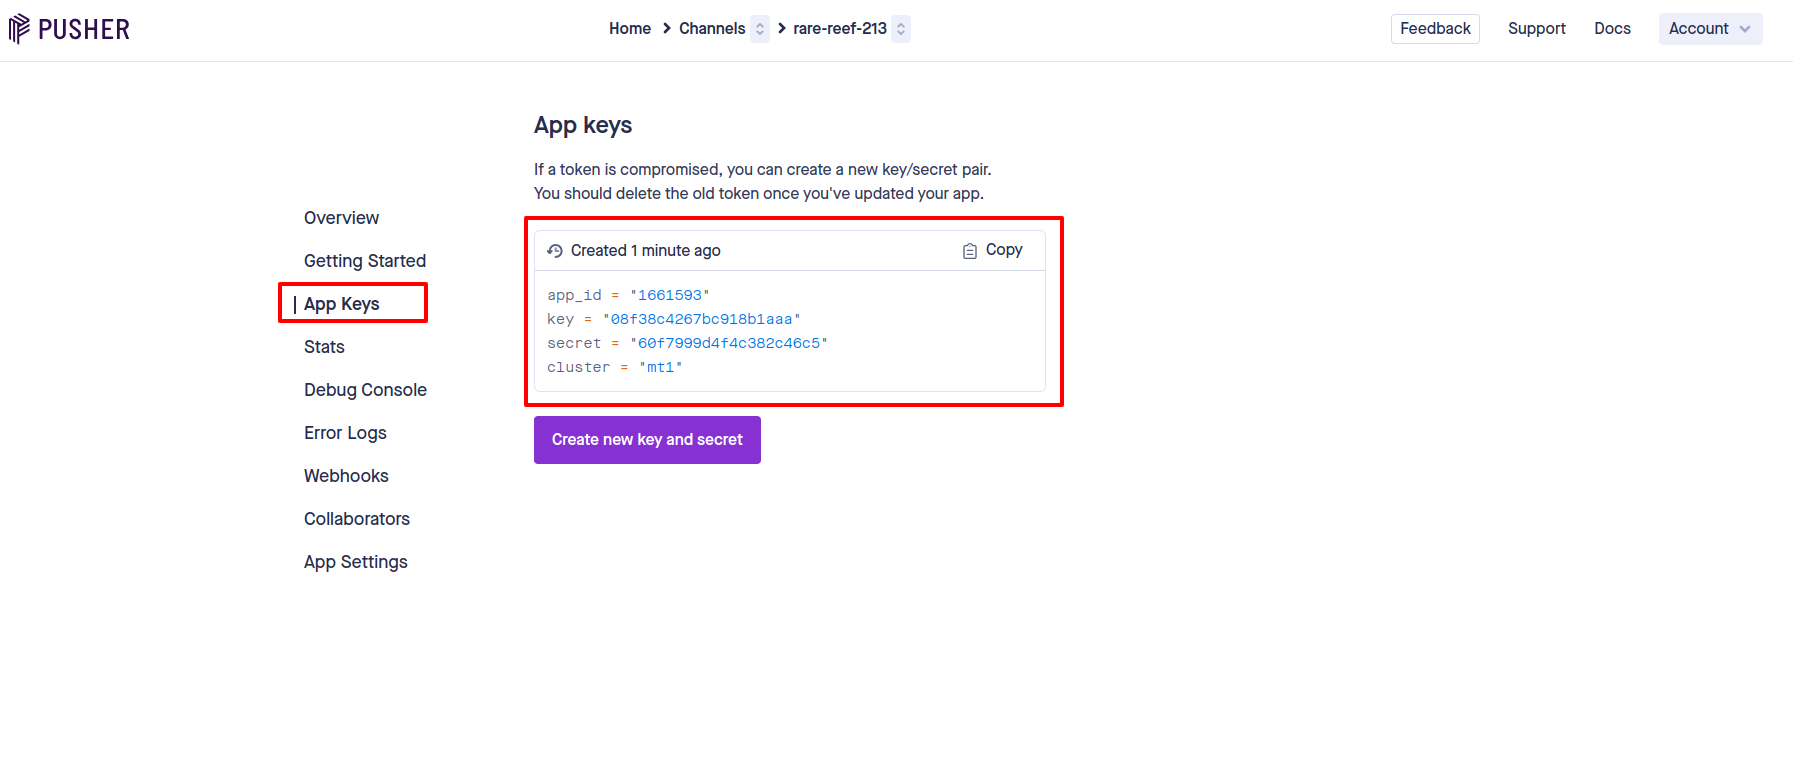
5.After configuring the settings, Pusher will generate your app's credentials, including the App ID, Key, and Secret
Key. Keep these credentials safe.
6.In your code, use the provided credentials (App ID, Key, Secret Key) to initialize the Pusher instance. Refer to
the specific SDK documentation for detailed information on how to configure and use Pusher in your application.
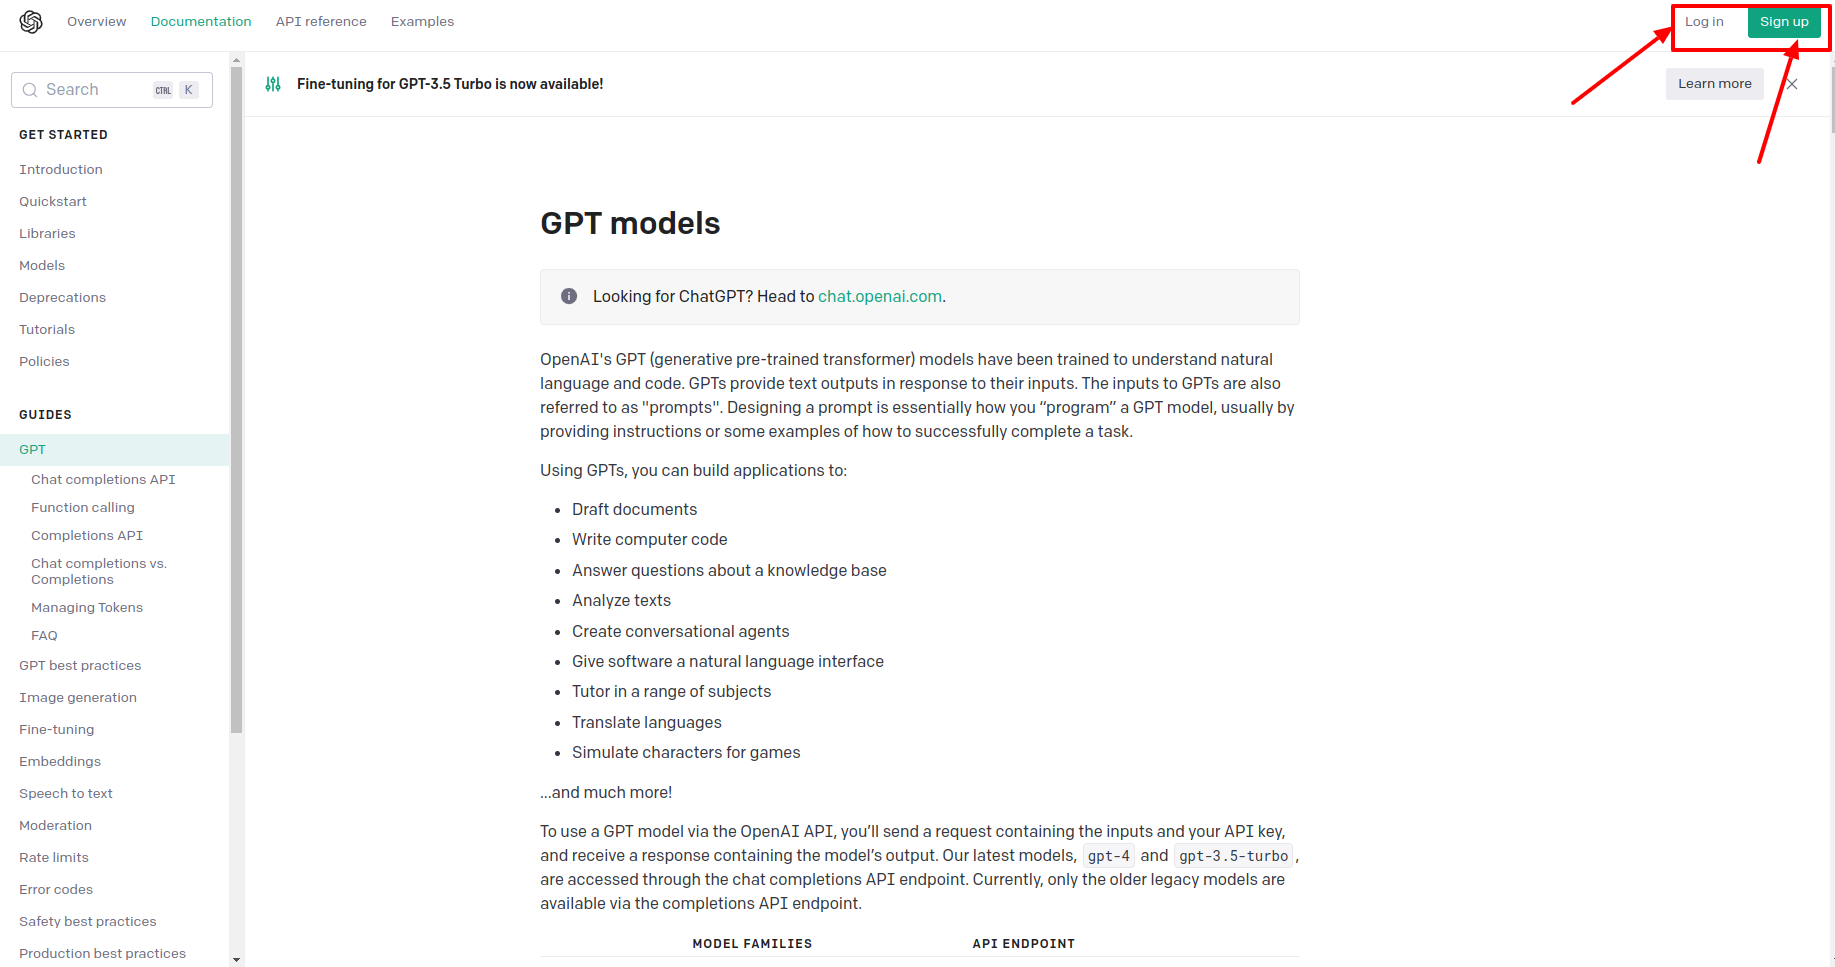
Chat GTP-4 Api Key
1.Go to the https://platform.openai.com/docs/guides/gpt and sign in to your account. If you don't have an account,
you'll need to sign up first.
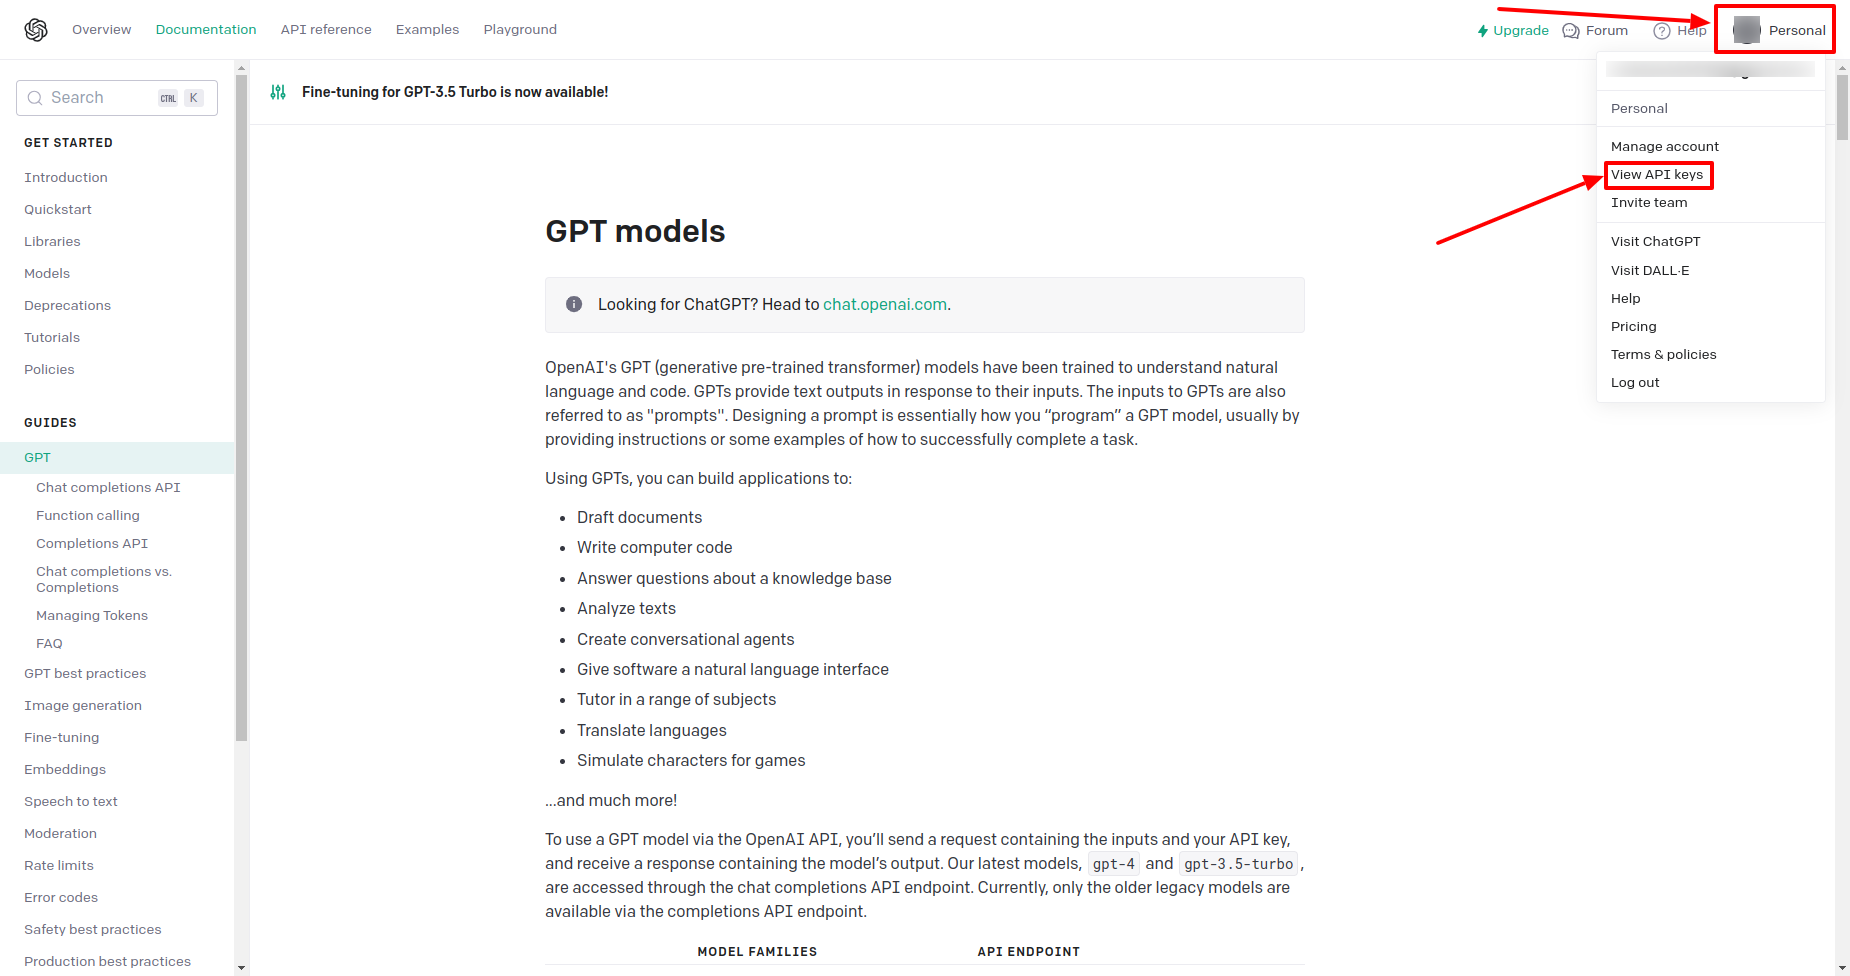
2.Go to right side Personal settings. And click this View API keys
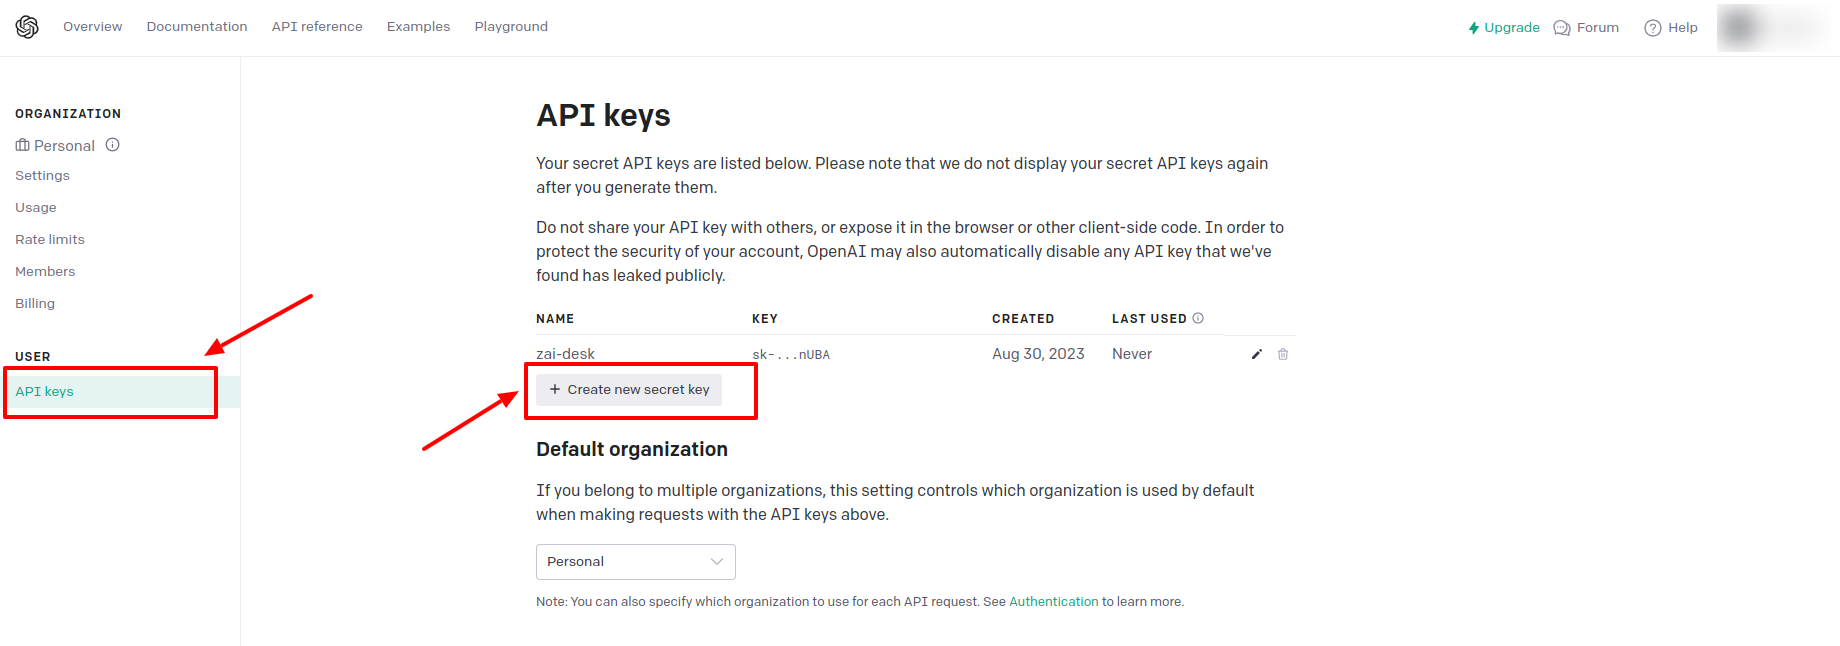
3.Last step Create new secret key and generate new key.
Chat Setting
- If you update this from here
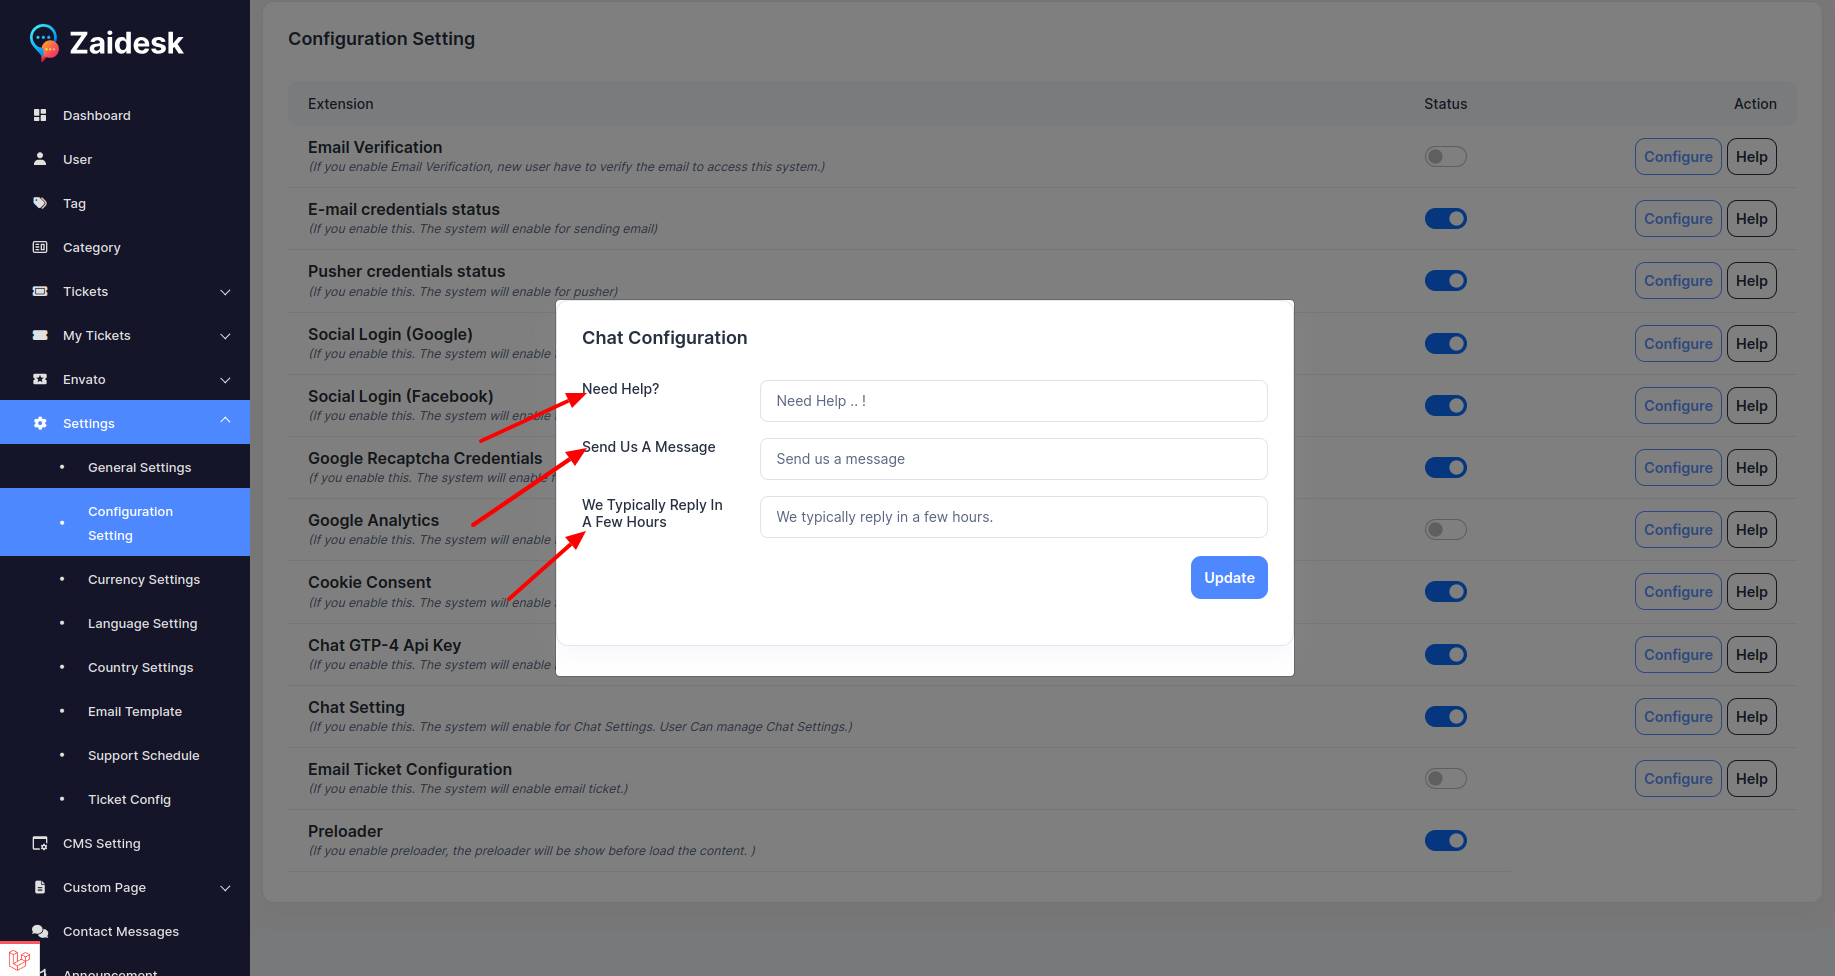
- Then you can see here agent or customer panel.
Google Analytics
Below is a comprehensive guide on how to configure Google Analytics step by step:
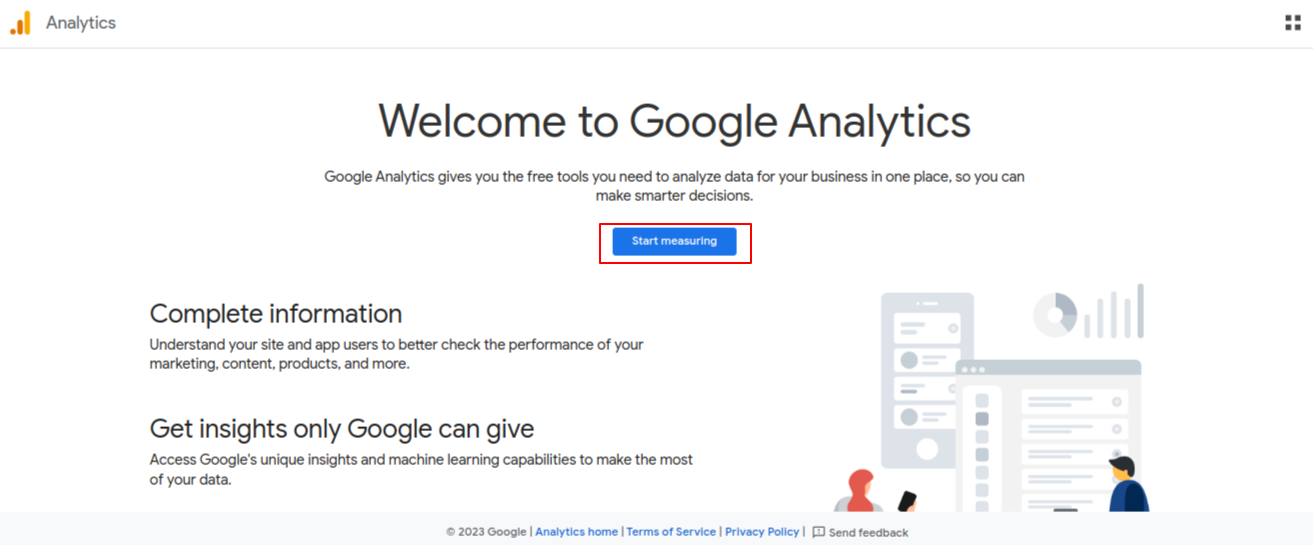
- Step 1: Sign Up for Google Analytics
1.Go to the Google Analytics website: https://analytics.google.com/
2.Sign in with your Google account or create a new one. 3.Click on "Start measuring."
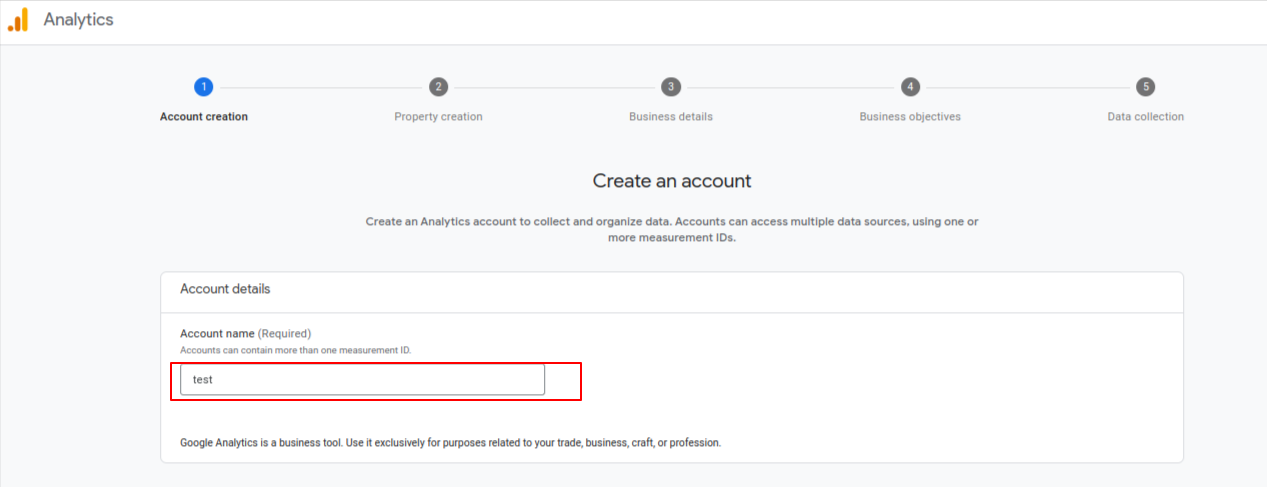
- Step 2: Set Up a Property
1.Click on "Create account."
2.Fill in the Account Name (usually your website or company name). 3.Click on "Next."
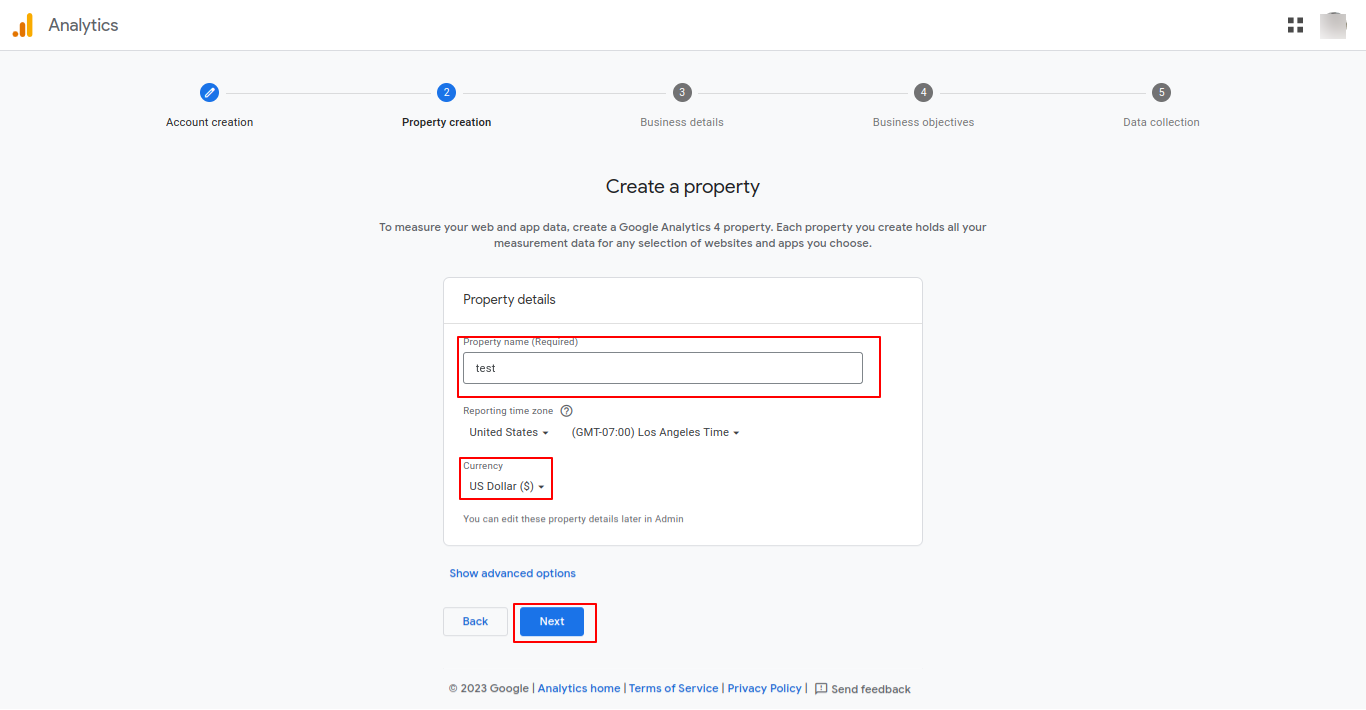
4.Fill in the Property Name (your website's name) and Website URL. 5.Select the appropriate Industry Category and
Reporting Time Zone. 6.Click on "Create."
- Create A Property
- Describe your business
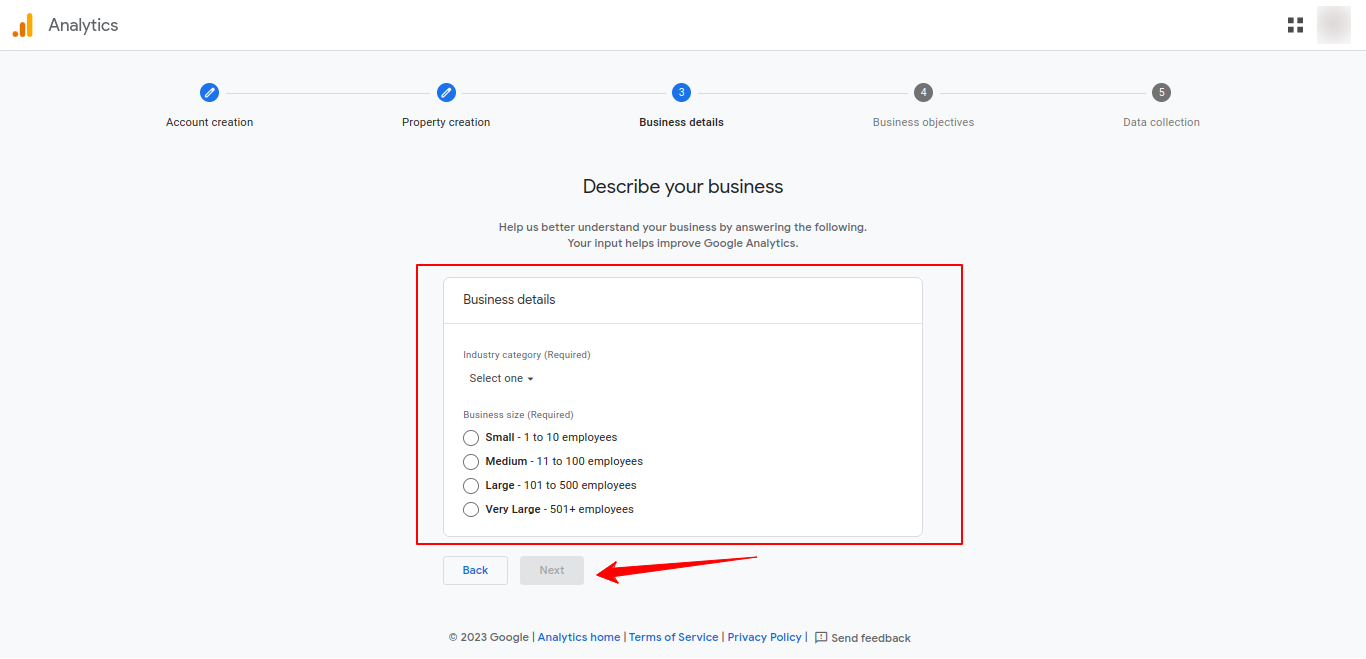
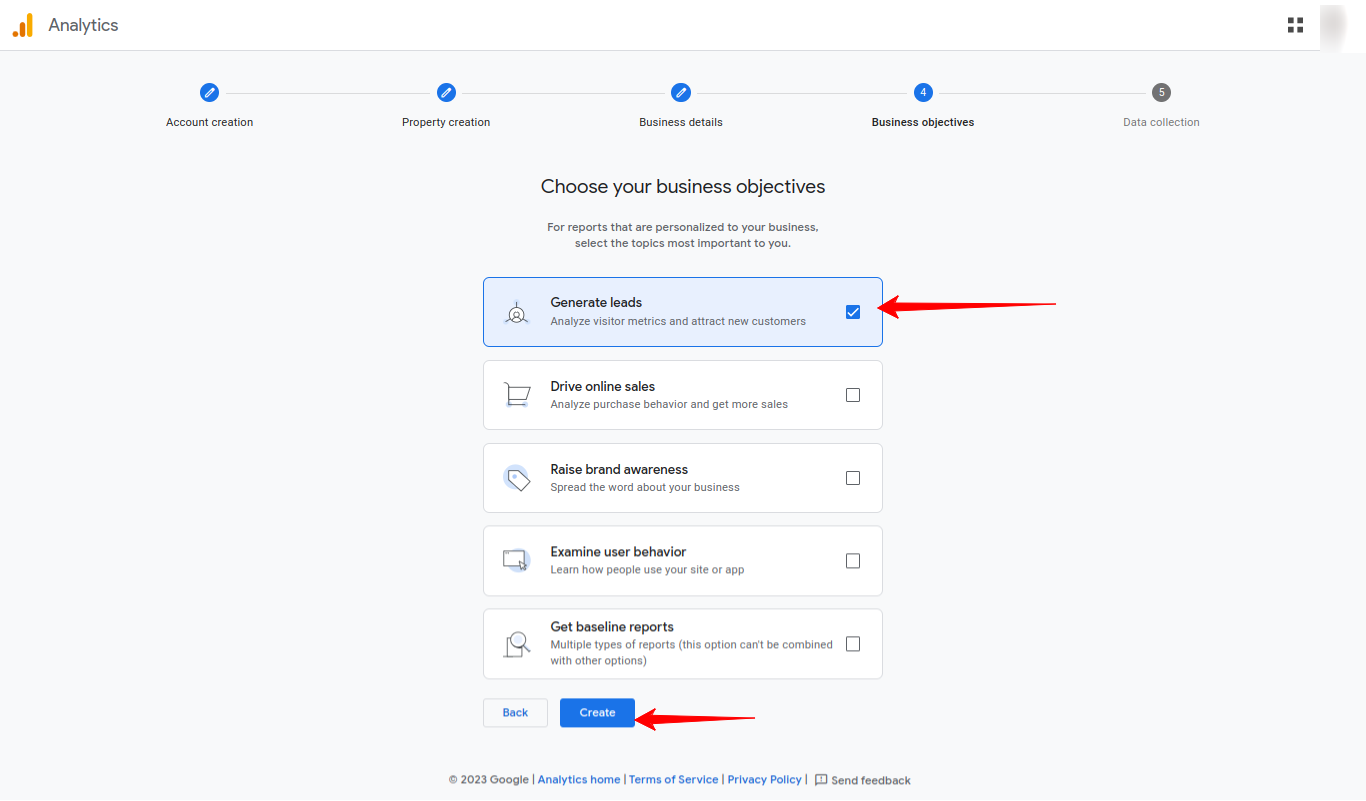
- Bussiness object
 -After creating the property, you'll be provided with a tracking code snippetselect "web".
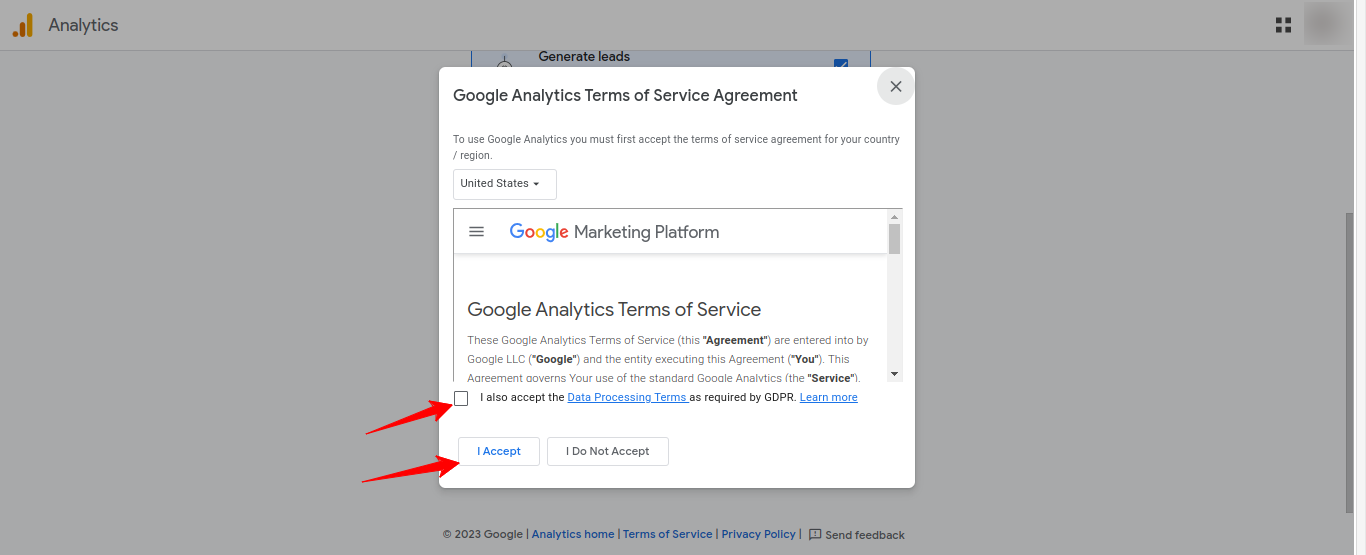
 -Select Google Analytics Terms of Service
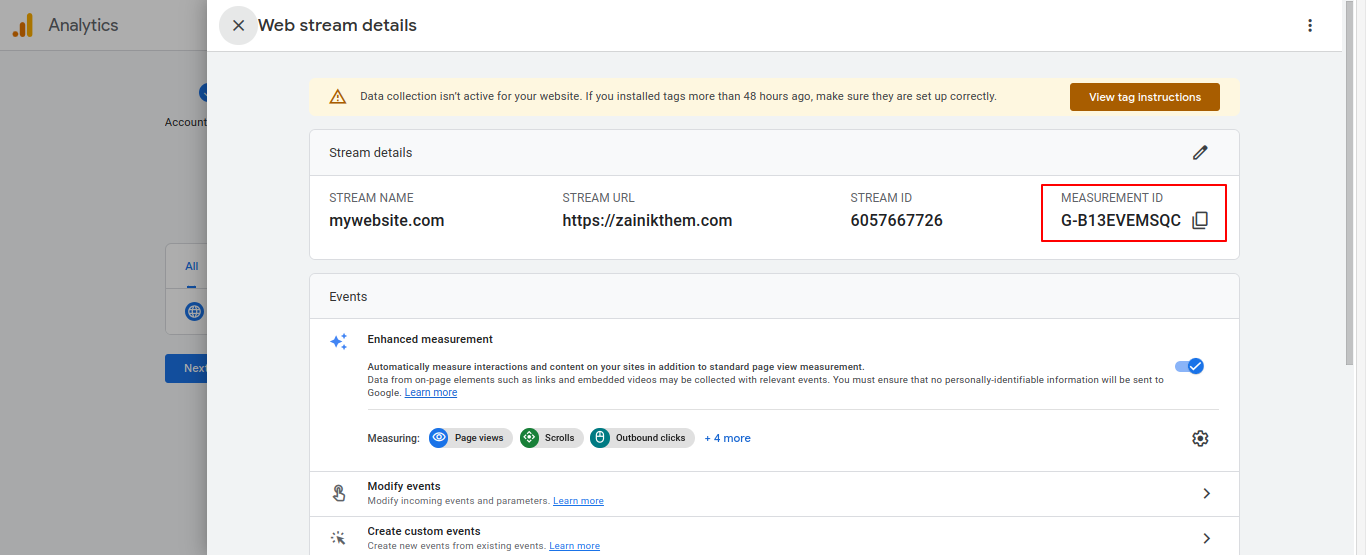
 -Selete website url and Stream name
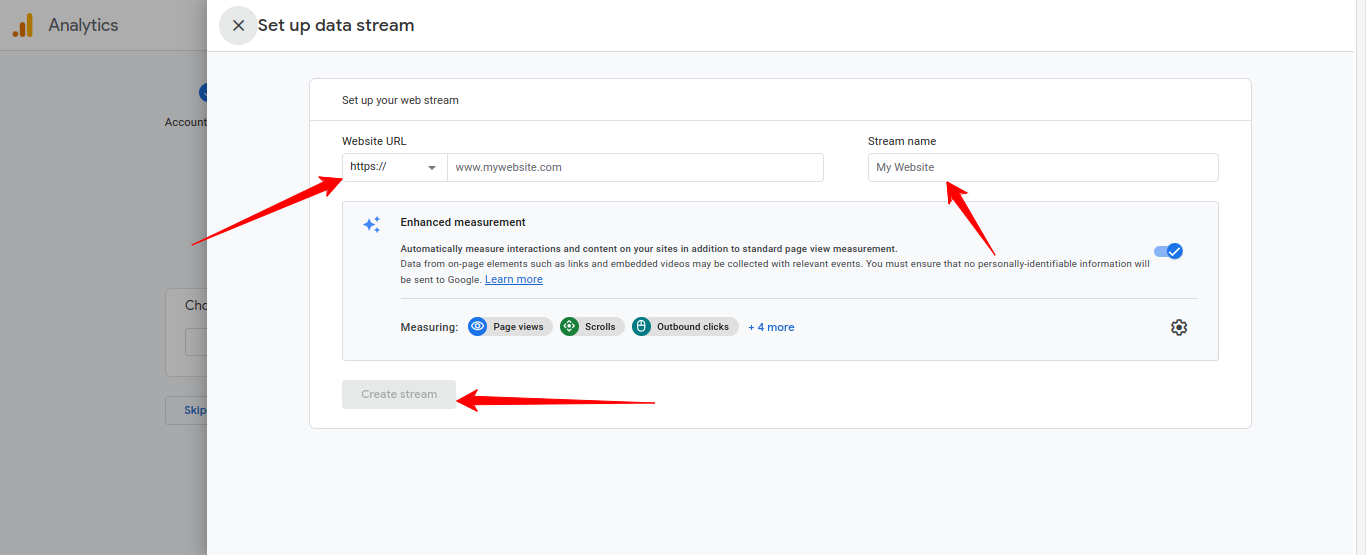
- And show MEASUREMENT ID and copy